Review: TransTEC F7 flight controller
TransTEC company is known for their racing drones and quality frames. They stepped one step further and released their first flight controller called simply TransTEC F7.
Specifications and features list
MCU: F722
Gyro : MPU-6000
5UARTS
BEC: 5V 3A
Input power: 3S-6S
Betaflight target: TranstecF7
RealPIT VTX control
Selectable power source for Camera and VTX
TransTEC F7 overview
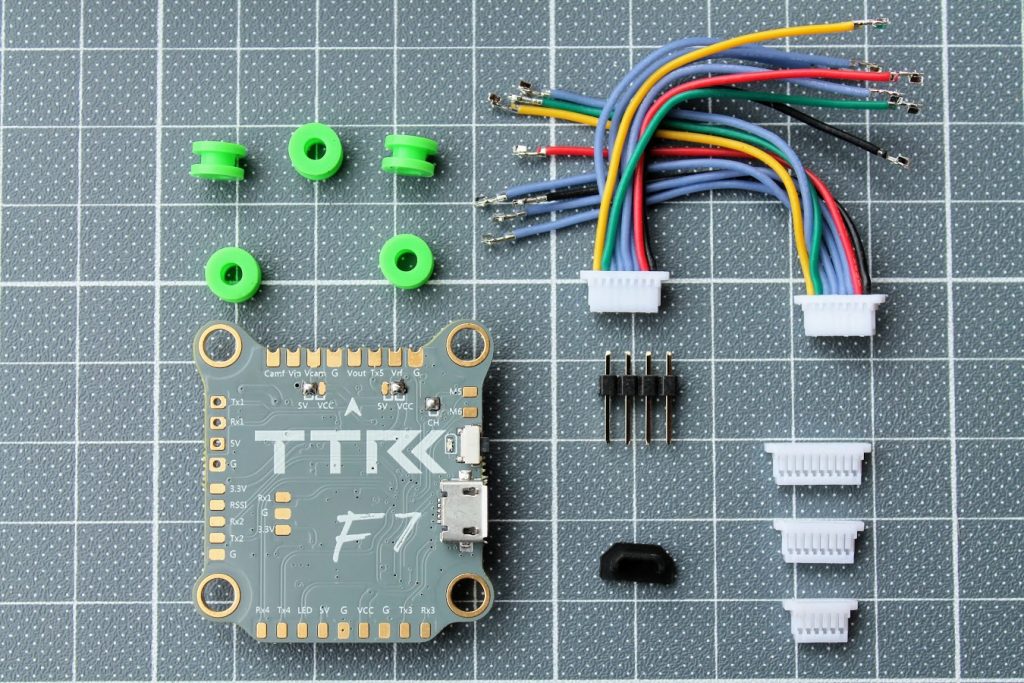
Package contents: TransTEC F7 board, sillicon rubber grommets, cables, 4 pin header and USB cover.
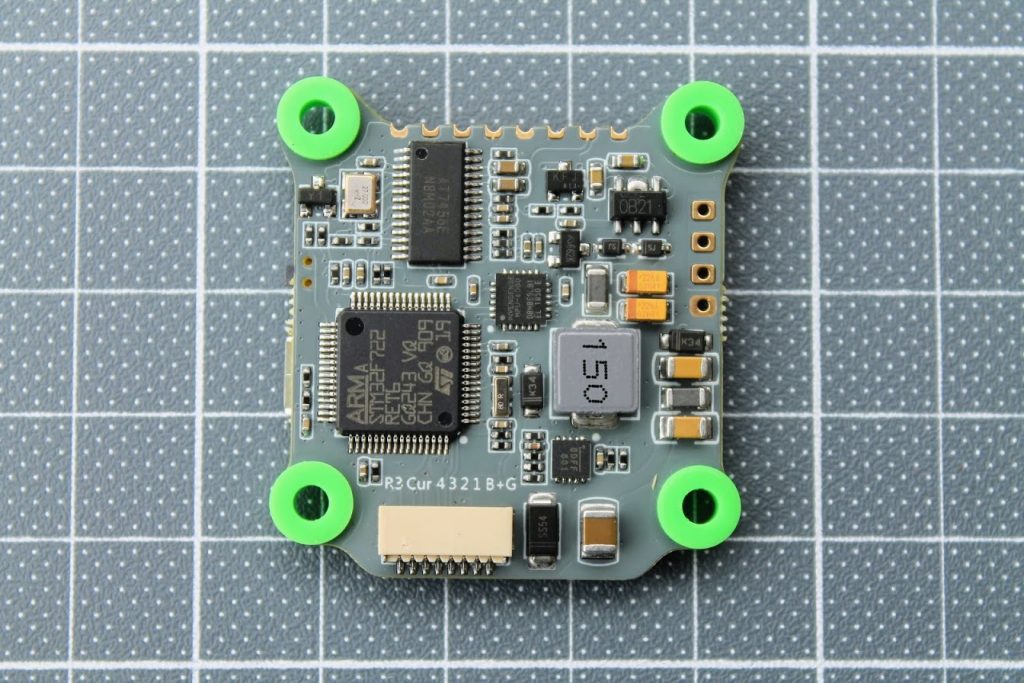
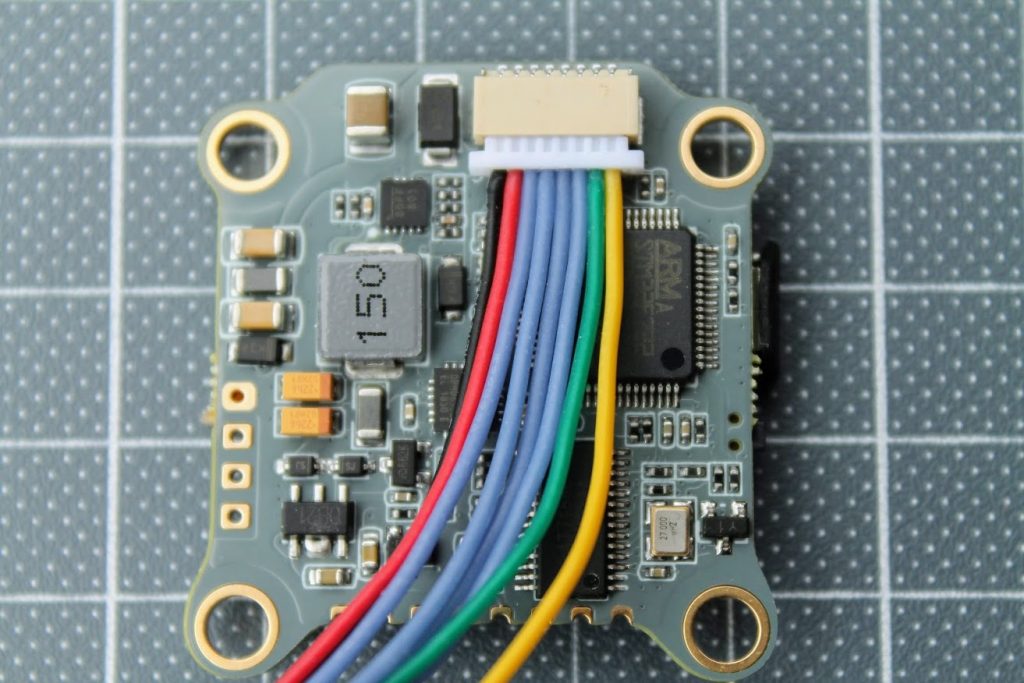
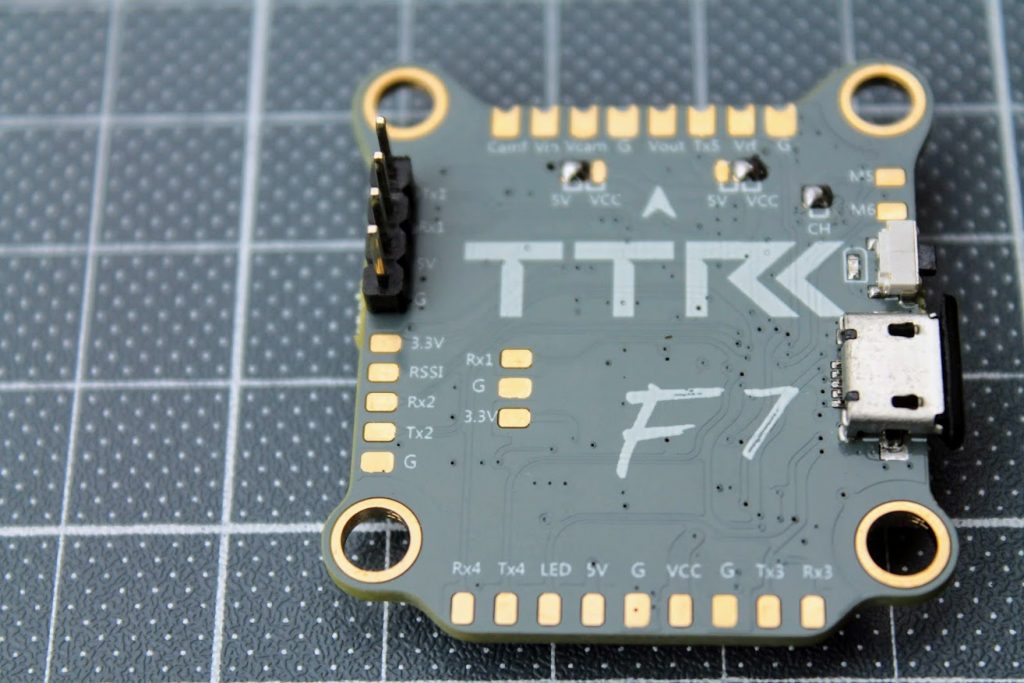
FC board quality is excellent. All components well placed and soldered. It has fancy grey coloured overlay. FC has MPU-6000 gyro and mounts have sillicon rubber grommets so this board is really should be vibration resistant.
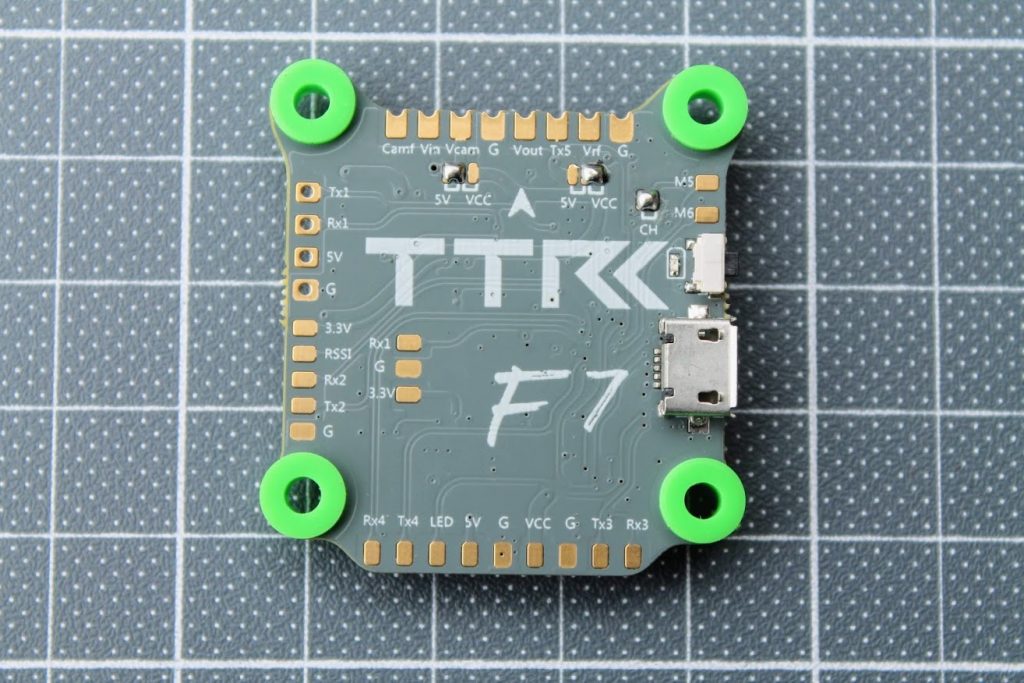
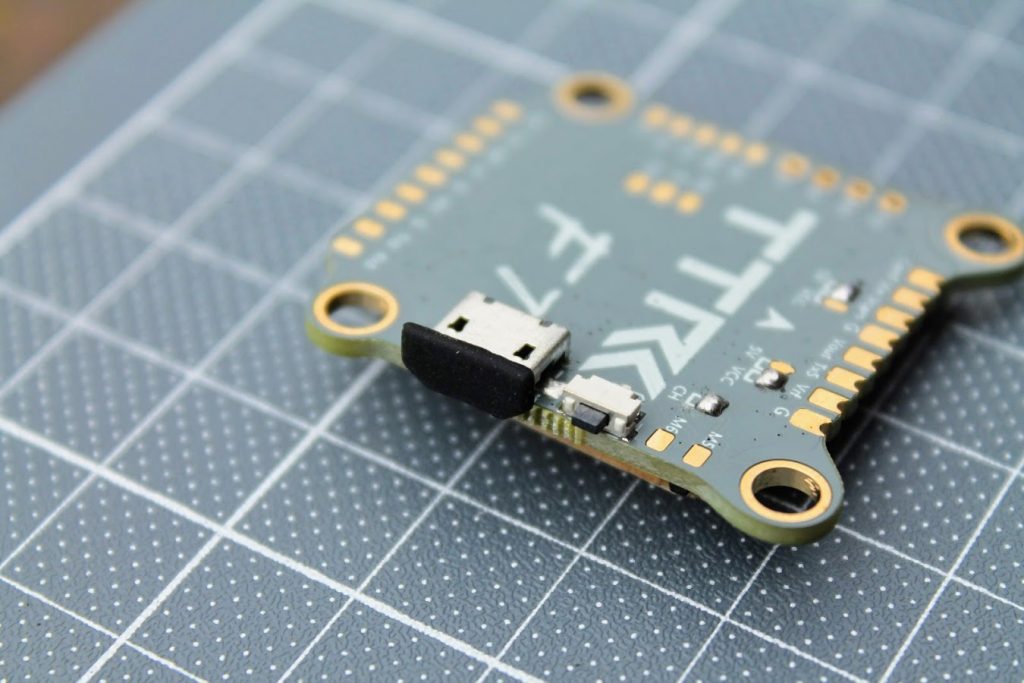
Top side of the FC is flat and almost without any components. Only the status LED, boot button and USB socket are present.
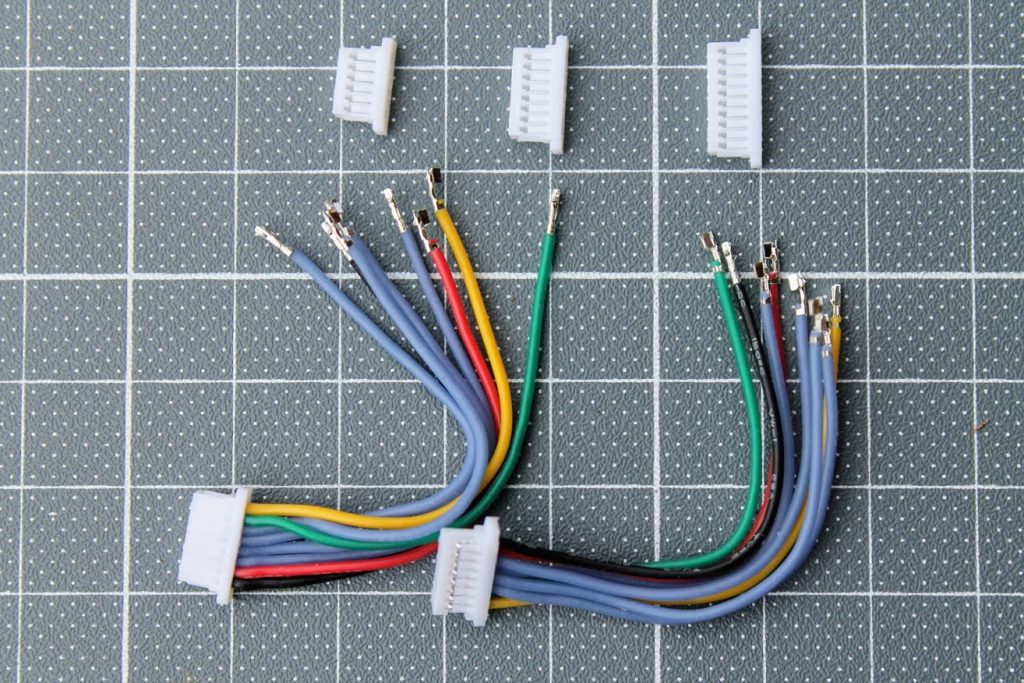
There are two ESC cables included with do-it-yourself 6-pin, 8-pin and 10-pin connectors. With this kit you should be able to make a special cable for almost any of the 4-in-1 ESC board.
ESC cable socket is oriented invards. I personally think its great idea. It cleans up the build and minimizes the number of cables that stick out of the stack. Now we only need the 4-in-1 ESC that has also inwards facing connector. TransTEC, we are waiting!
TharnsTEC also included the USB socket cover to prevent the socket from getting dirt. Especially if your props are rotating in reversed direction.
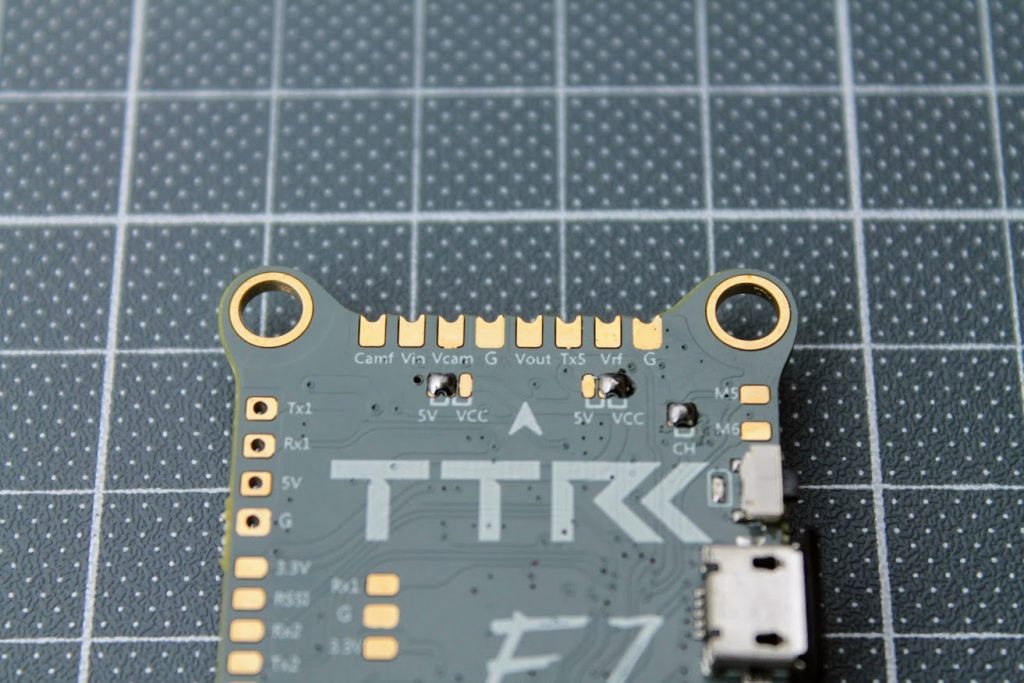
On the upper edge of the top side there are camera and VTX connection splder pads. Pats in the order of presence from the left to the right: Camera OSD control, Video in from Camera, Camera power supply and Ground. Video out to the VTX, VTX SmartAudio/Tramp control (TX5), Power for VTX and Ground. Power source for camera and for VTX can be selected by connecting together the solder pads below. By default the Camera gets +5V and the VTX gets +V from the battery directly.
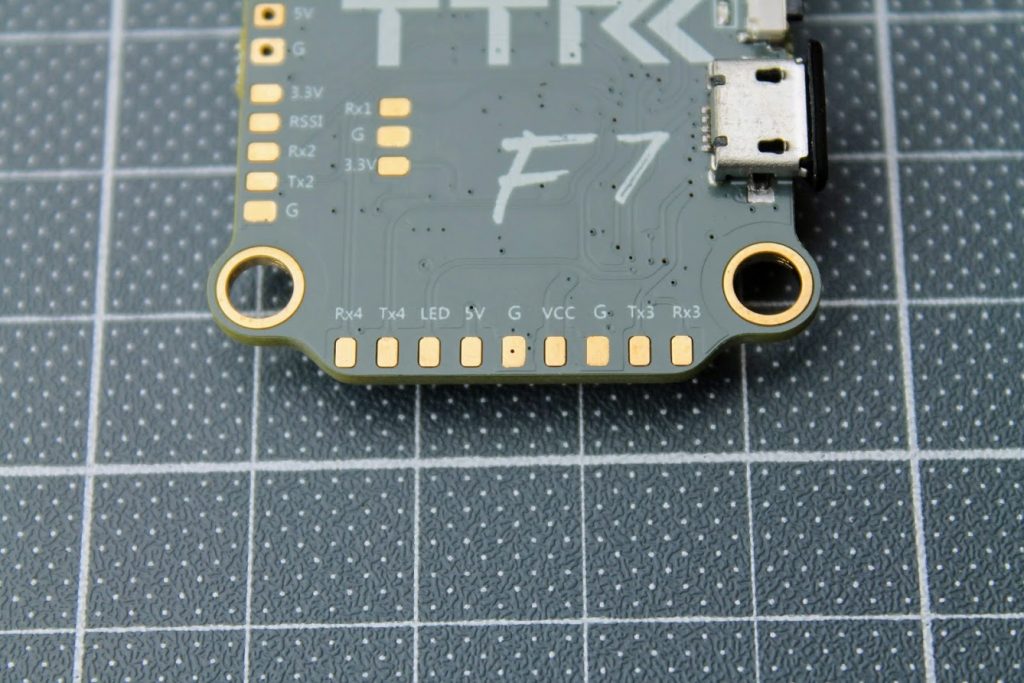
On the lower part of the board you can find extra UART4 and UART3 solder pads and LED pads.
The most interesting feature of this flight controller is possibility to mount the receiver on the top of the FC. There are 4 through hole pads (Tx1, Rx1, 5V and GND) available to solder the TBS Crossfire Nano receiver or FrSky XM+ directly to the flight controller! And there is even place left for Nano VTX on the top side of the TransTEC F7 flight controller. It also has 3.3V, GND and Tx1 pads for Spectrum receiver.
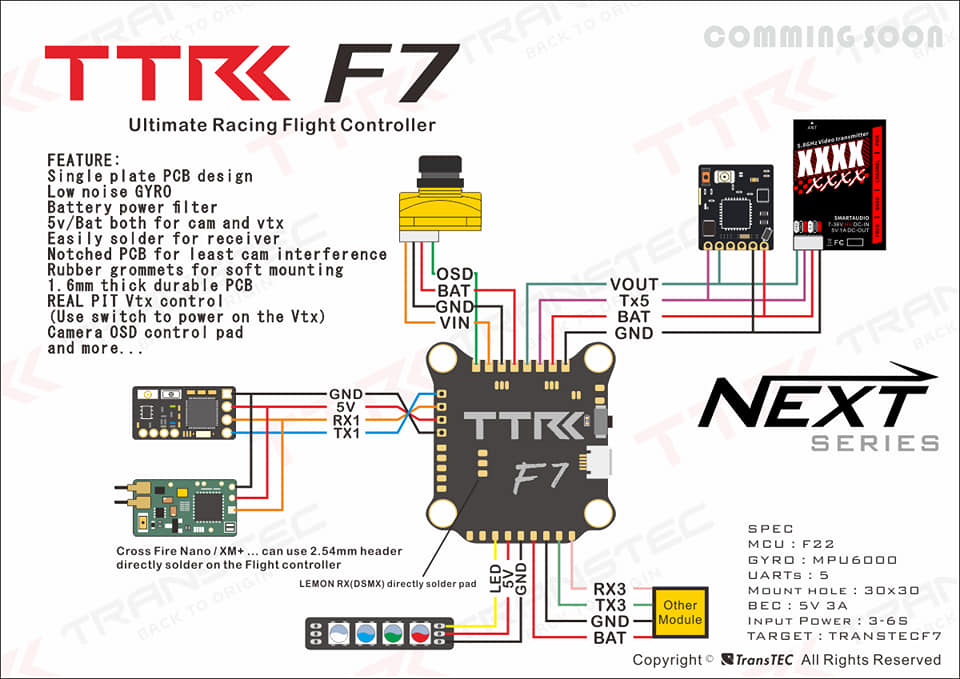
TransTEC F7 connection diagramm:
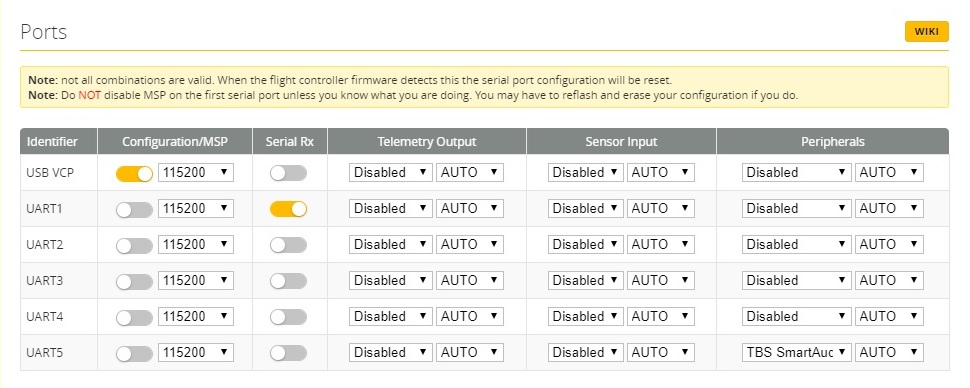
TransTEC F7 Ports settings in Betaflight configurator:
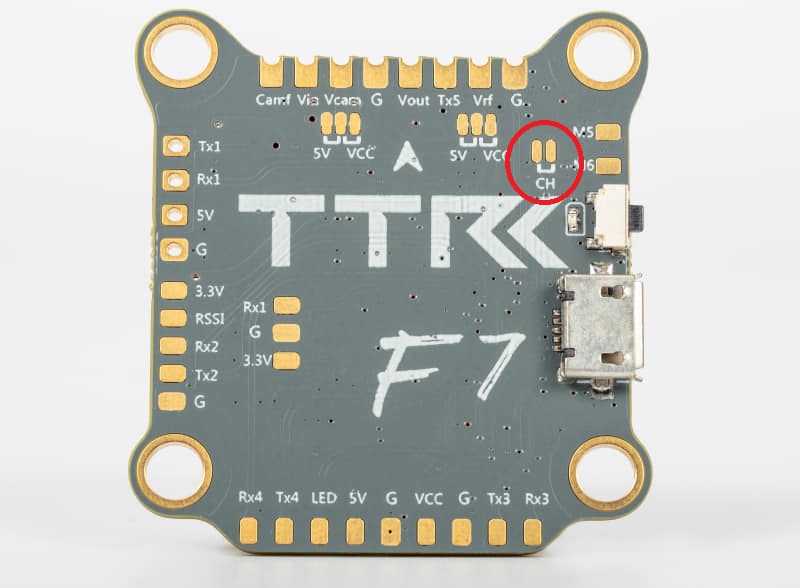
RealPIT VTX control is turned off by default. You can can be enable it by unbridging the CH pads:
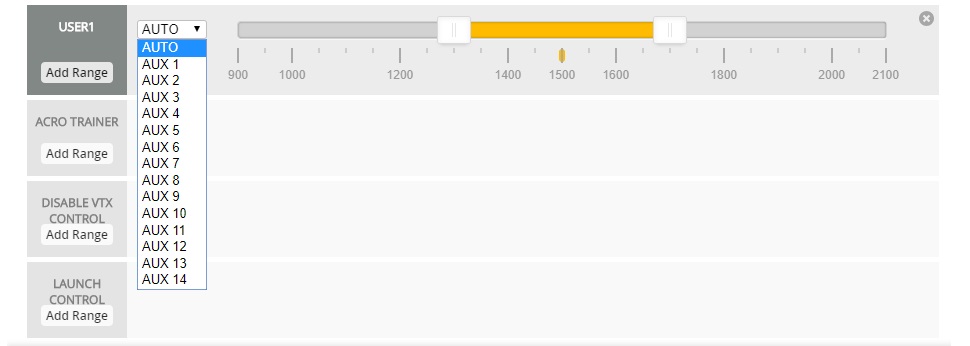
Then set the USER1 mode to any of your transmitters AUX channel like the picture below. Use your own switch range values:
After these modifications you will be able to control the VTX power ON/OFF by any selected transmitters switch.
TransTEC F7 is available @
TransTEC: https://www.transtechobby.com/list/59/460.htm


Where do you solder the buzzer????
That’s a good question! The one of the possible ways is to use M5 or M6 pads and remap the resoources. But the problem is you cannot solder the active buzzer directly to the MCU outputs because buzzer draws more current than MCU pin output can sink. Usually buzzer output pads (BZ+ BZ-) have additional circuit – power transistors to control the buzzer. You probably can use the so called Buzzer – lost quad finder with built in battery. It should have it own circuitly to drive the buzzer.
That’s the first thing I noticed when I opened it and looked it over. I’m trying to figure that out. There is a 5v, grd, and tx3 and rx 3 that may be usable for a buzzer. It says for “other module”.