Review: Eachine ATX03 – micro transmitter with audio
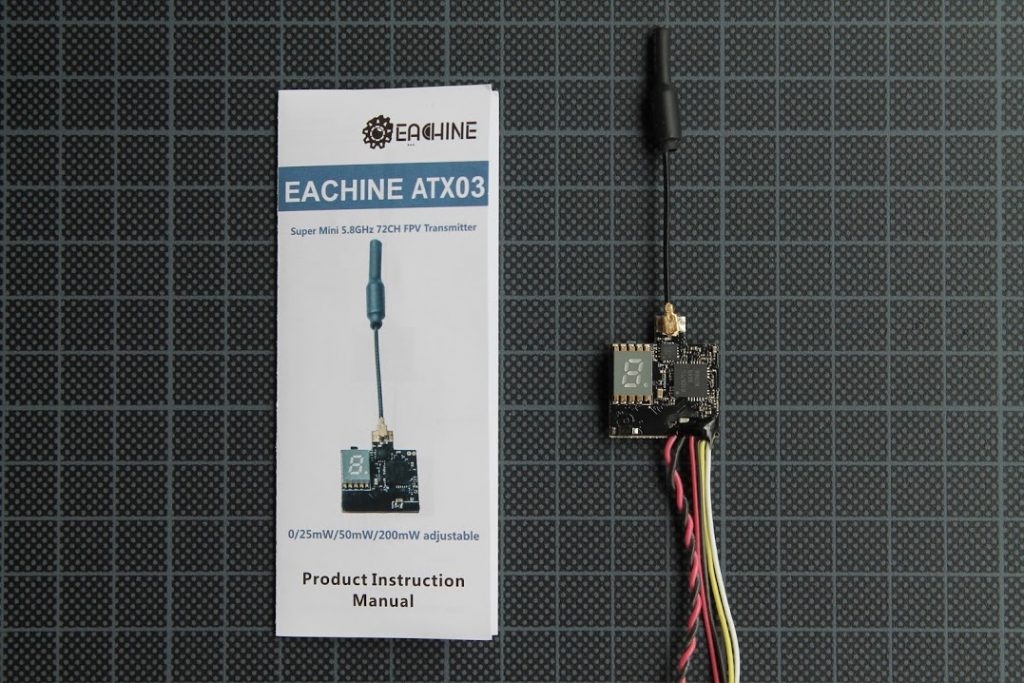
Eachine has a series of micro video transmitters – VTX01, VTX02 and VTX03. They all are very small, lightweight and can be used where space and weight requirements are tight. VTX01 has fixed output level at 25mW, VTX02 – fixed at 200mW while VTX03 has switchable power levels from 0 to 200mW. They all can be used from micro quadcopters to large sized FPV planes. One thing they all lack is audio. So recently Eachine released new micro video transmitter with audio function – ATX03.
Eachine ATX03 has 4 power output levels 0/25/50/200mW. So it can be used on small 1S brushed quadcopters where power source has limited current and it also can be used on the other FPV aircrafts with the power level set to 200mW for a longer range flights. You will need to power it from separate +5V BEC if you’r aircraft is using 2S and bigger batteries.
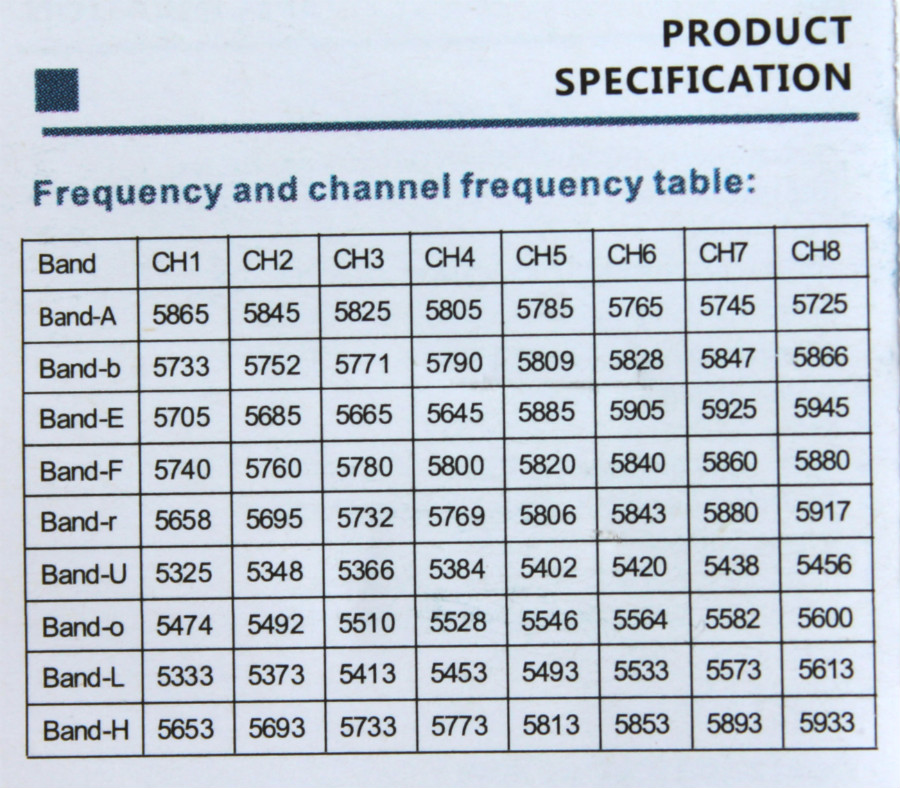
Channel, band and power output can be changed by one button, located on the top side of the transmitter. Transmitter has 9 bands with 8 chanels in the each band. Channel can be chosen by short pressing of the button. Band can be switched by pressing the button for more than 2 sec. Output power level can be switched by pressing the button for more than 5 seconds. You can toggle between 0mW, 25mW, 50mW and 200mW. Full band/channel list with frequency table below:
Antenna is very flexible and almost indestructable in the case of the crash. Antenna is linear polarized dipole, connected via IPEX connector.
The replacement antennna can be found here. Also you can change this linear polarized antenna to cloverleaf antenna with a IPEX connector to reduce the multipathing interferences.
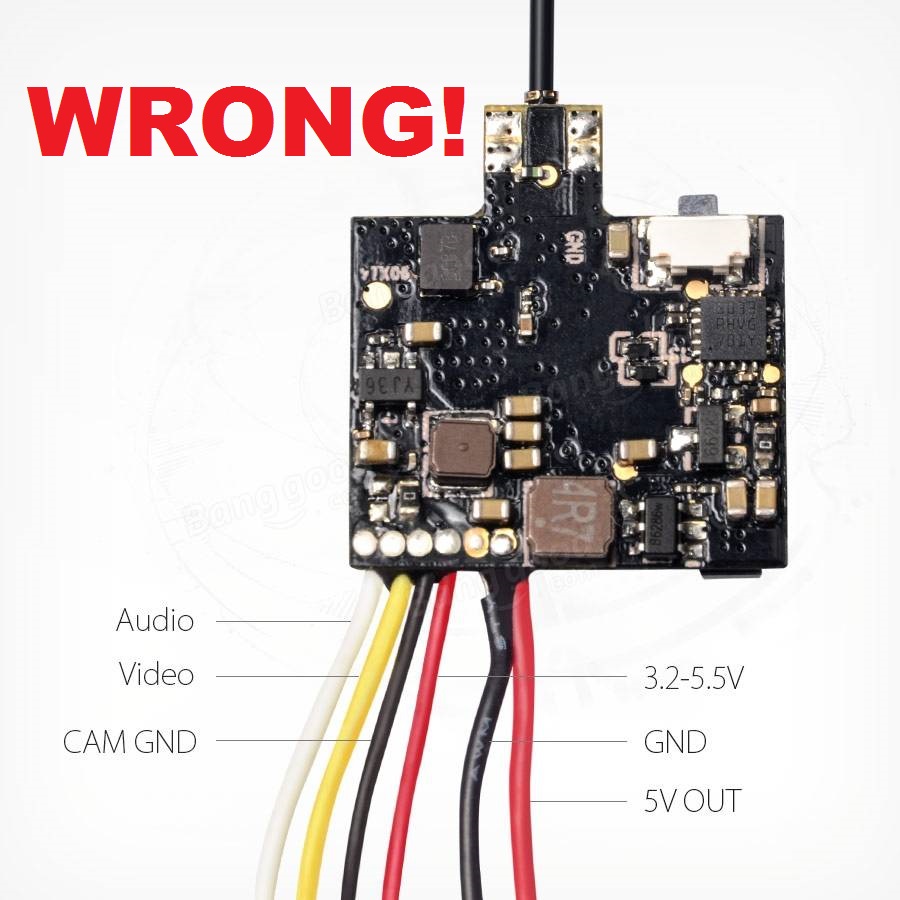
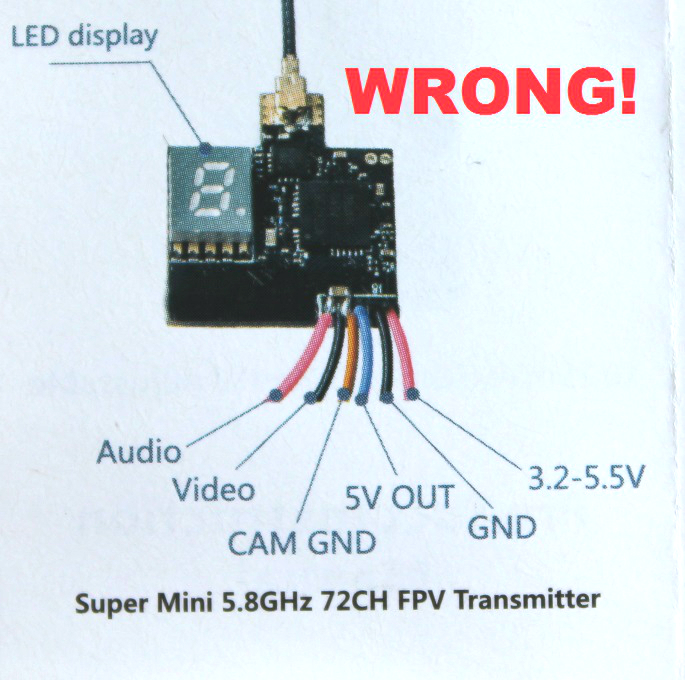
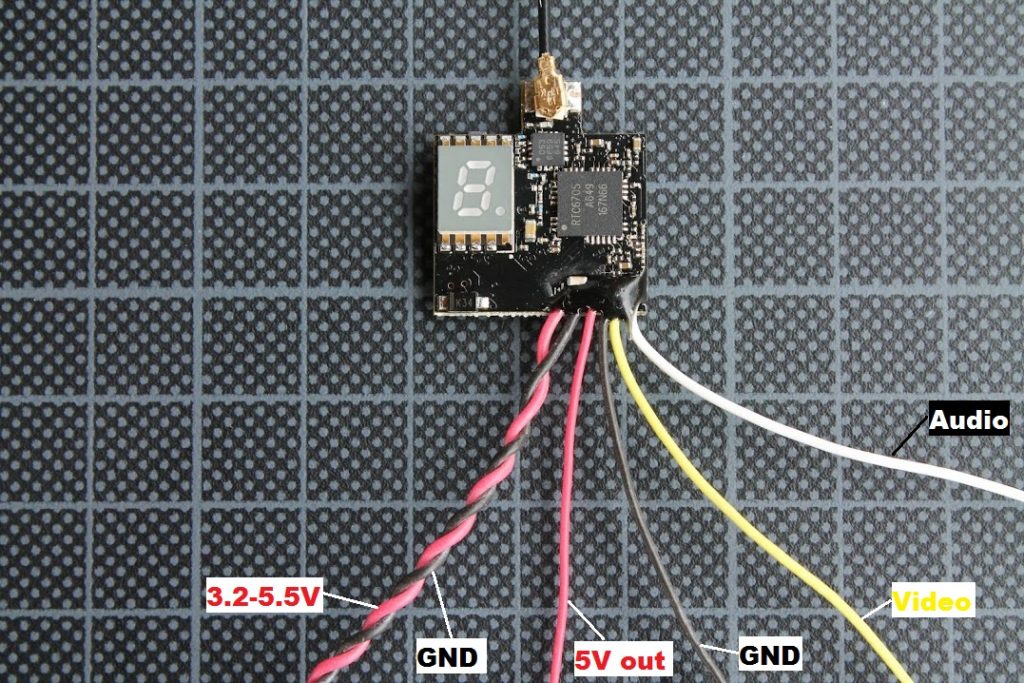
A special notice should be taken on this VTX pinout. Both sources, supplied user manual and product page on the website shows incorrect pinout of the transmitter.
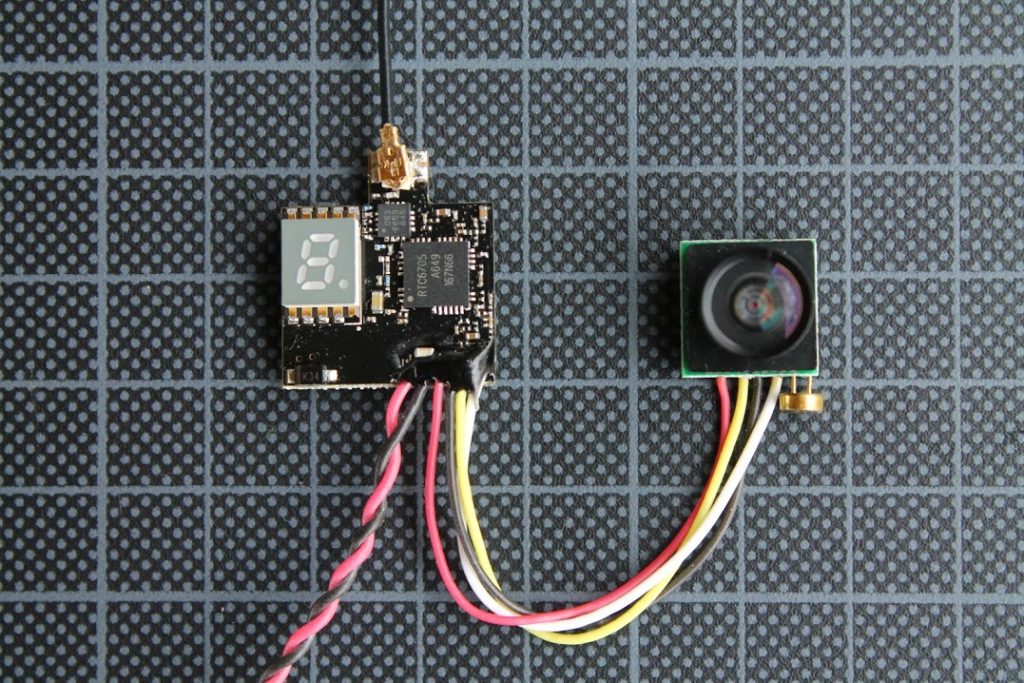
For the correct pinout you should use common sense and common color coding of the power and signal wires. Two of the innermost twisted wires are the Power In (3.2-5.5V) and Ground. These two wires end with a mini JST 1.5mm power connector. Other wires are Red – 5V output for camera, Black – ground, Yellow – video input, White – audio input.
One of the negative sides of this video transmitter – it comes with 1.0mm JST-SH 4 pin connector (if you dont know, JST stands for “Japaneese Solderless Terminal”). I don’t know any of the FPV camera, that somes with this type of connector. Usually cameras have 1.25mm Molex-PicoBlade (or so-called 1.25mm micro JST) connectors. This means you will definitely have to cut the suppllied connector and crimp on your own connector or solder the VTX wires to the micro camera pads directly. I have to notice, that wires, comming from this VTX are silicone coated, flexible and it is real pleasure to solder them.
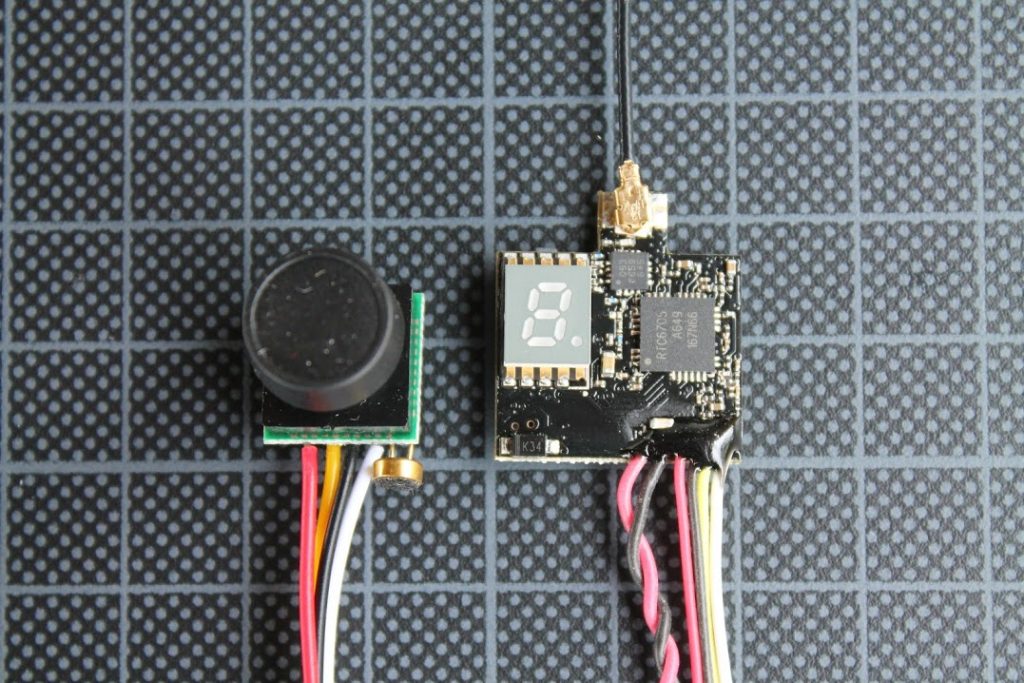
This VTX works perfectly in combination with variuos micro cameras. Lets try to connect 600TVL 1/4 1.8mm CMOS FPV 170 Degree Wide Angle Lens Camera to this video transmitter. There is a tiny microphone soldered to the camera bottom side.
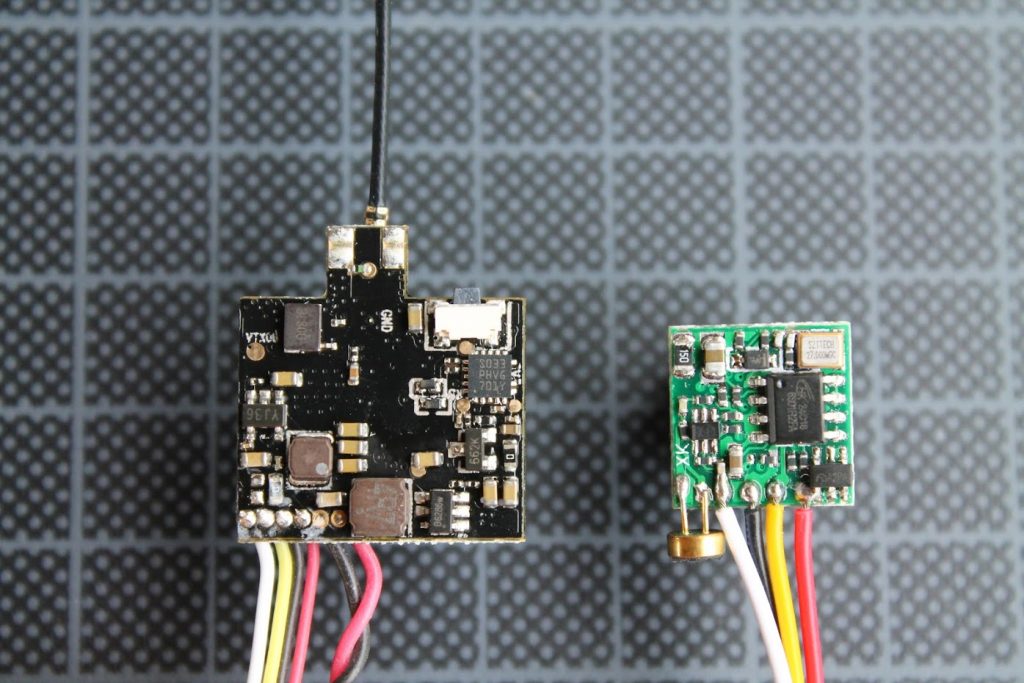
Back view of the camera nad VTX. Camera has 4 wire pads: audio, ground, video and +5.
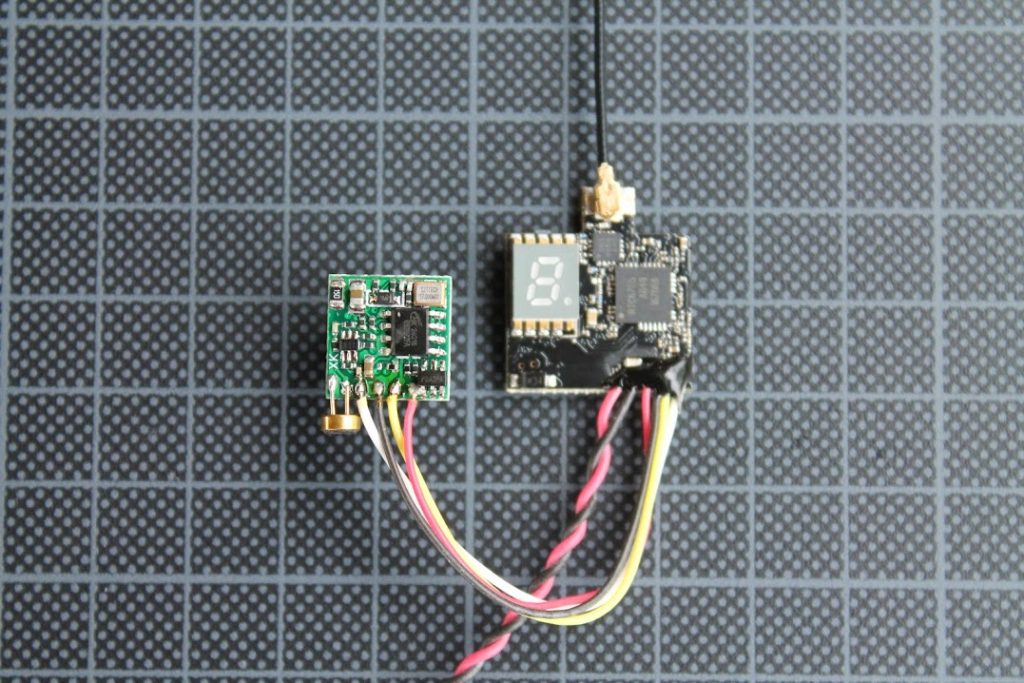
So it is only needed to solder the same color wires from the VTX to the same color wire pads.
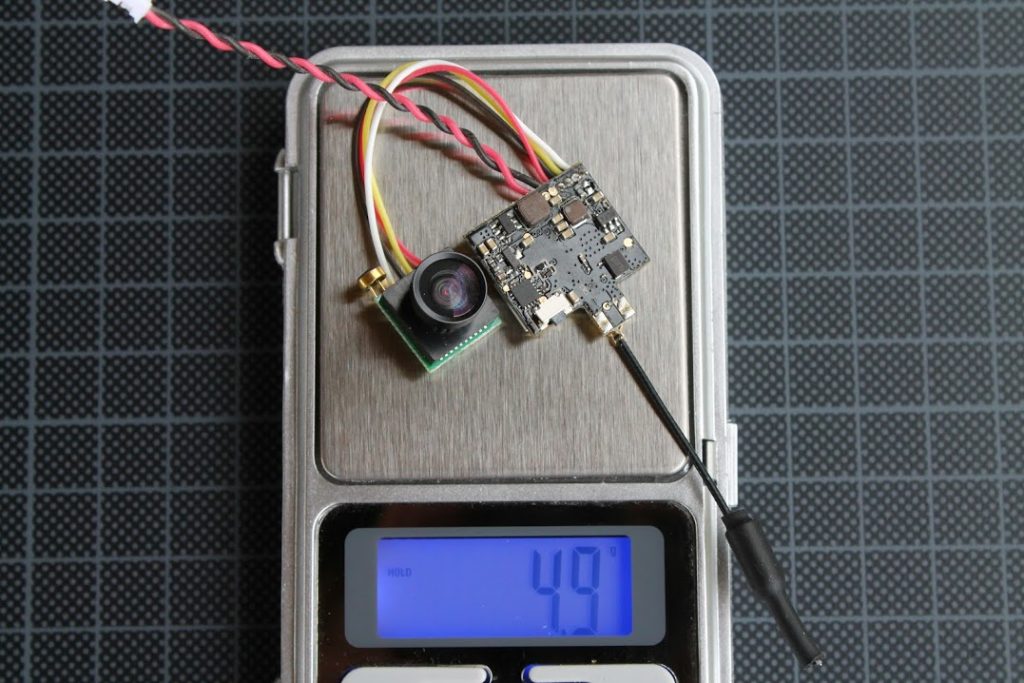
Final result:
Total weight – only 4.9grams.
Sample flight video (and audio):
Pros
- 72 Channels, 0/25/50/200mW powel levels
- Silicone insulation wires
- Lightweight
- Flexible antenna
- Has audio input(!)
Cons
- Supplied 1.0mm JST-SH camera connector is useless.
Conclusion
If you have audio out on your goggles or your DVR is capable to record audio, then this VTX is your way to go. I personaly like the sound of the motors. It makes the FPV more immersive. Also you can receive more information about the throttle state via audio feed back and thus have a better experience in the flight. This ATX03 transmitter weights the same as Eachine VTX03 and costs only a fraction more, so I would highly recommend ATX03 over VTX03.
Disclaimer: This item was supplied by Banggood for a fair and unbiased review. Banggood never asked for a positive review and never infuenced my opinion in any way. I’m trying my best to stay uninfluenced and give only my own opinion. All affiliate links if there are any help me purchase items for future reviews.


Nice review! Can I ask where you got the drafting pad that is black with gray grid pattern? I have been looking for one like that for a long time! Thanks
Thanks. I have bought this drafting pad (cutting mat) in the local shop. I think it was made by “Leniar” or smth. I suggest to search for “black cutting mat” on the net.
Hi can I pair ATX03 with my RS832 reciever for my laptop live streaming or I need to by a seperate one matching it???
Thanks
Shabbir
ATX03 pairs with RC832 receiver perfectly. Hovewer I don’t know how are going to do live streaming. If you want to intput video feed into Laptop (and then stream to Inet) you’ll need to have some video capture device (like EazyCap) or ROTG01 receiver with capture device.
Hi montis
Thanks a lot for guiding as I was really frustrated surfing google to find out my query.
Actually I have a capture card of EazyCap for laptop for my RS832 reciever but i was only concerned of pairing with ATX03 which I ordered seperately.
Can I ask you for some more help for interfacing and freq/channel mapping of ATX03 with RS832??
Thanks
Shabbir
Sure, I will answer if I know the answer. Try from the Band A, channel 1. Or just select the channel 1 on TX and RX and go through all the bands untill you’ll have the right band selected.
RC832 Frequency Table
Frequency Band A 5865 5845 5825 5805 5785 5765 5745 5725
Frequency Band B 5733 5752 5711 5790 5809 5828 5847 5866
Frequency Band C 5705 5685 5665 5645 5885 5905 5925 5945
Frequency Band D 5740 5760 5780 5800 5820 5840 5860 5880
Frequency Band H 5658 5695 5732 5769 5806 5843 5880 5917
Frequency Band L 5474 5492 5510 5528 5546 5564 5582 5600
Thanks a lot Montis
Pleasure talking to you will revert you back once done
regards
shabbir