Review: BetaFPV M03 VTX
BetaFPV M03 VTX is the updated version of their M01 VTX. The earlier version had one fixed 25mW power output level. The new M03 VTX is outputting from 25mW up to 350mW. Lets take a look at this VTX.
Page Contents for Review: BetaFPV M03 VTX
Specifications:
Output power: 25/100/200/350mW (adjustable)
Supply voltage range: 4.5-5.5V
Weight: 1.1g (antenna not included)
VTX internal size: 18x14mm
Frequency: 5.8GHz 48 channels, with Raceband: 5658~5917MHz
Channel SEL: SmartAudio
Modulation type: FM
Frequency control: PLL
All harmonic: Max -50dBm
Frequency stability: ±100KHz (Typ.)
Frequency precision: ±200KHz (Typ.)
Channel carrier error: ±1.5dB
Antenna port: 50 Ω
Operating temperature: -10℃~+80℃
Camera connector: JST-0.8, compatible with camera like BETAFPV C01, BETAFPV C02 and NewBeeDrone BeeEye.
Closer look
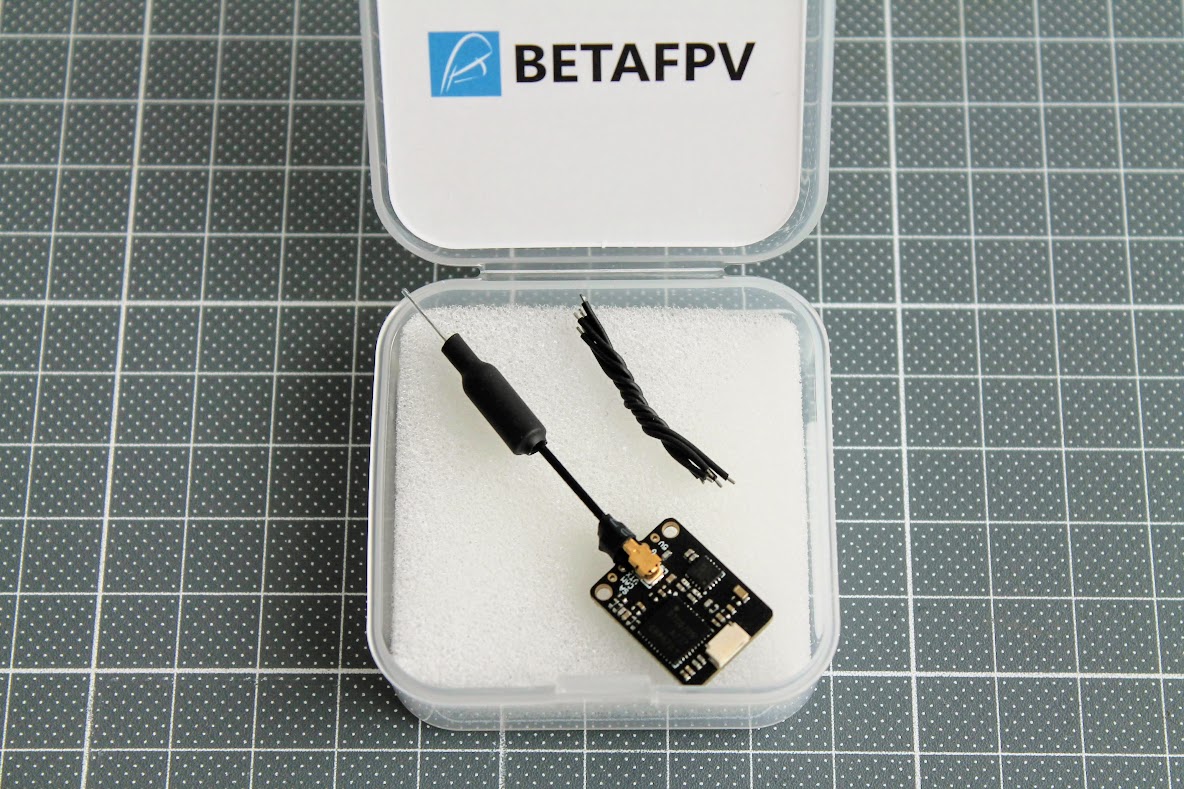
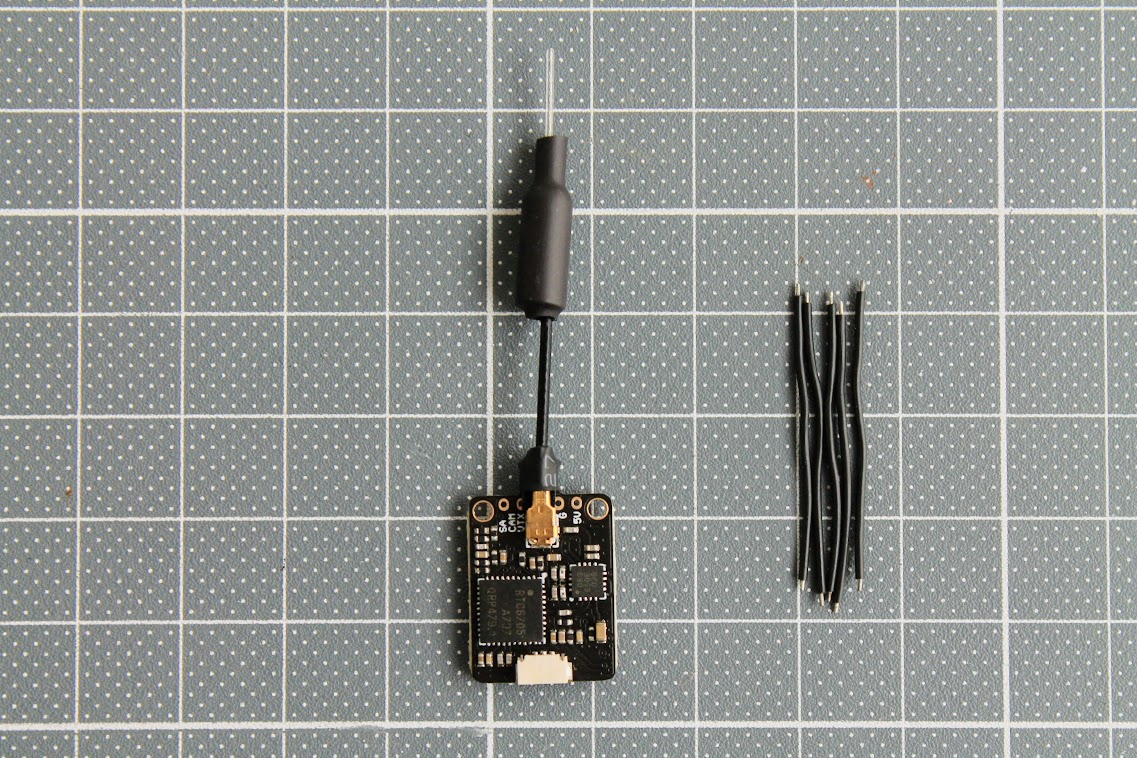
BetaFPV M03 VTX package contains M03 VTX, with linear antenna and 5 silicone wires for soldering this VTX to the FC.
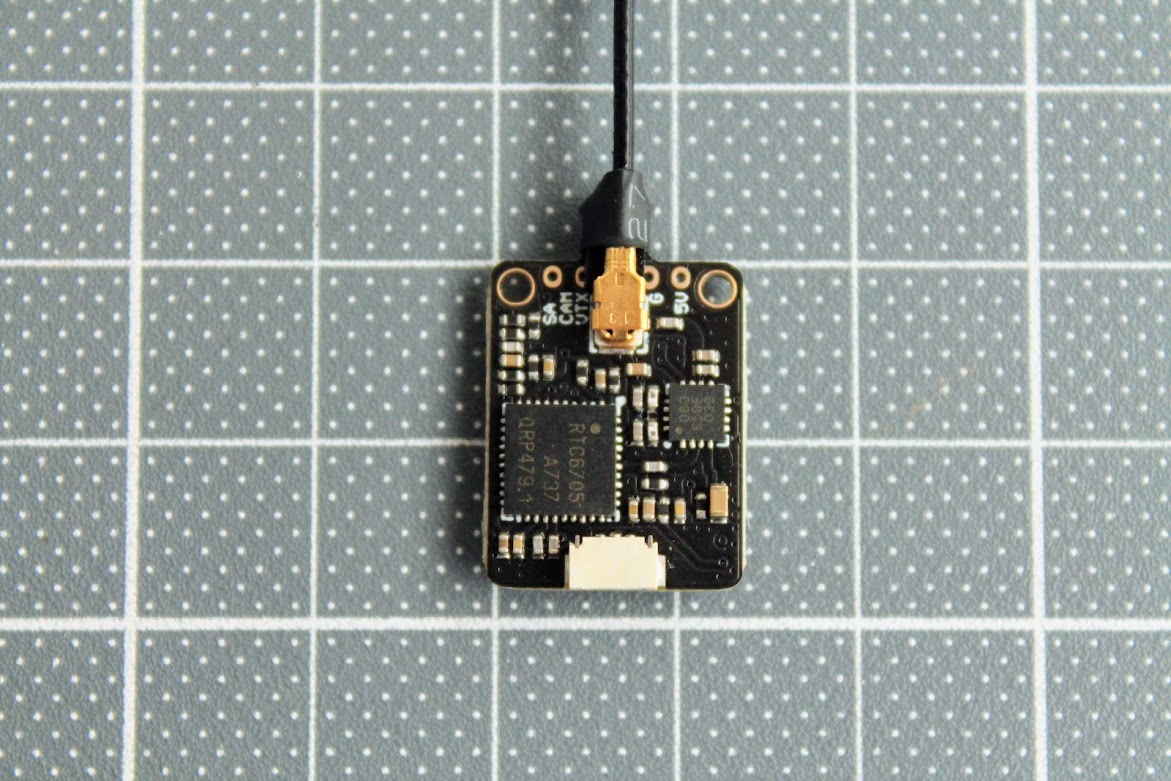
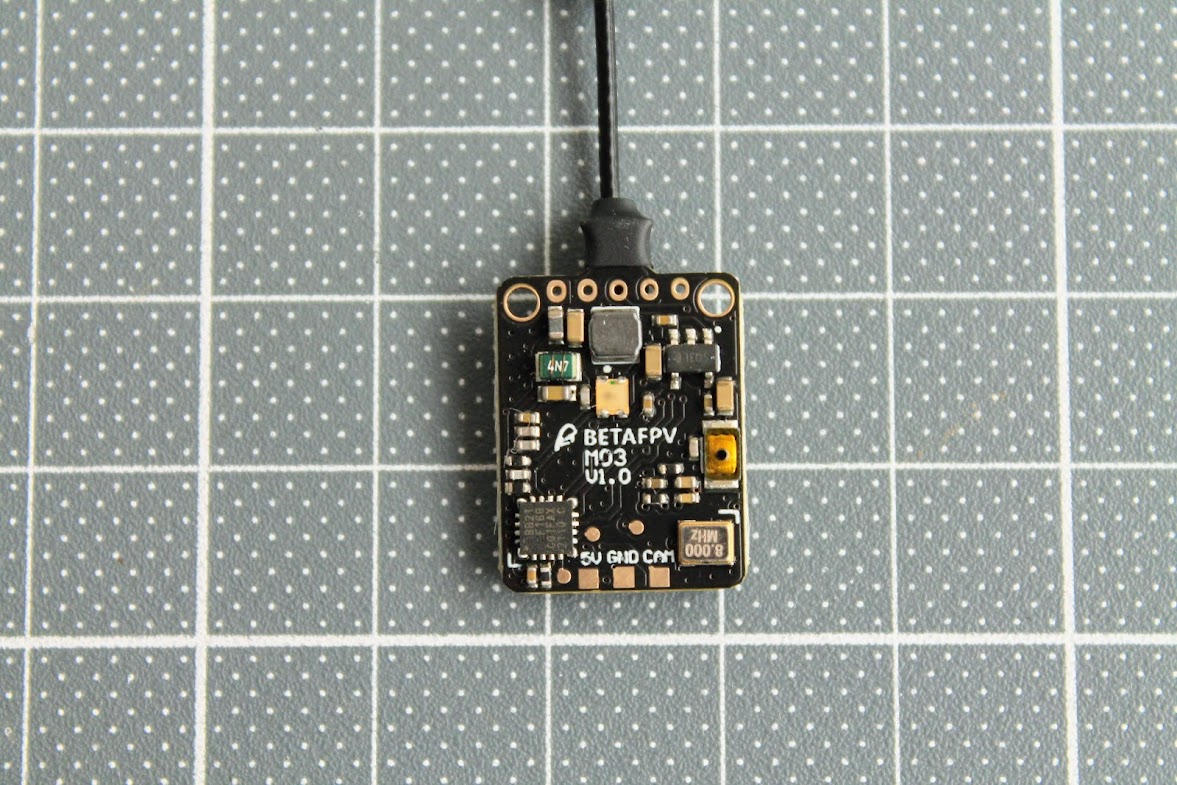
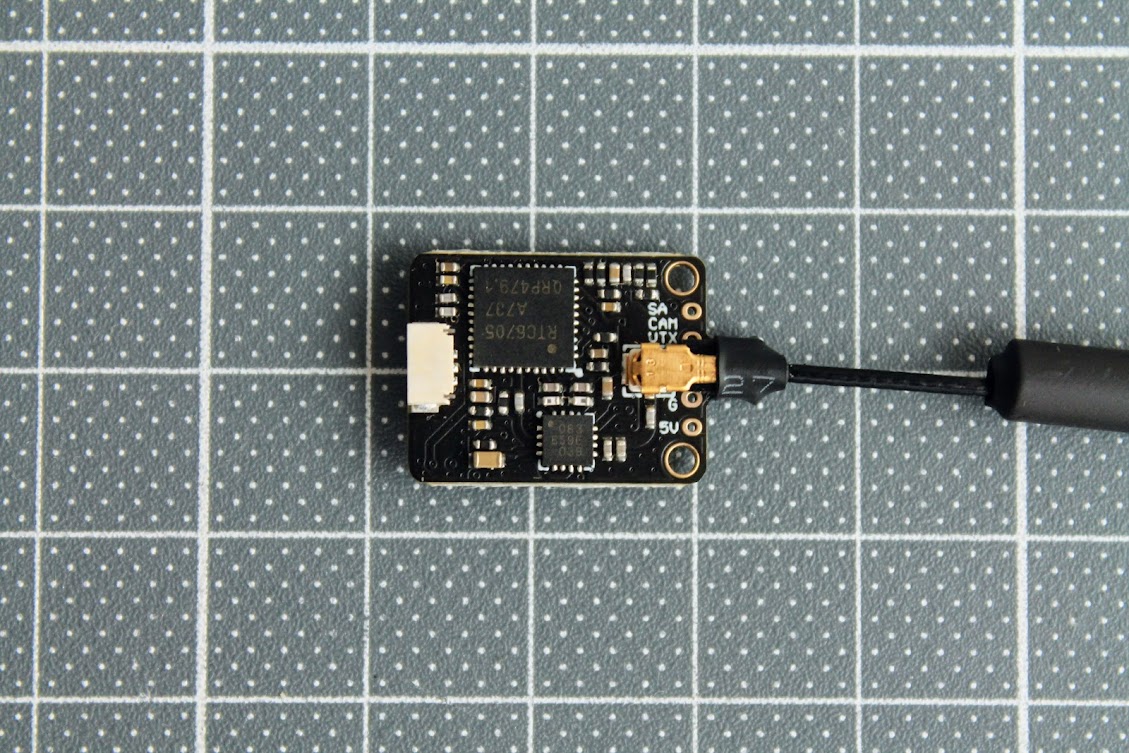
Top side view.
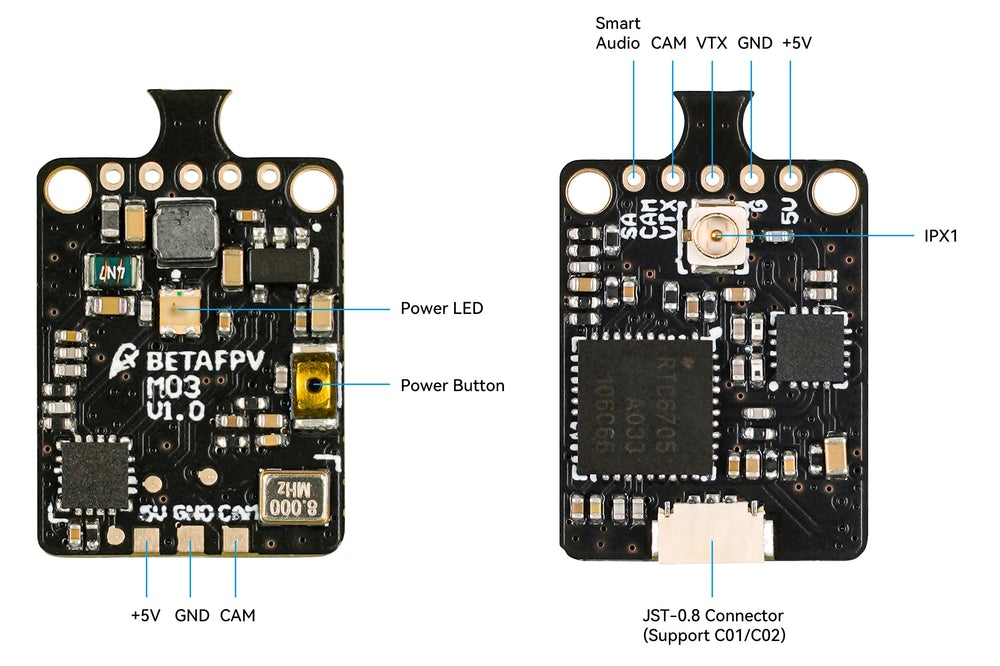
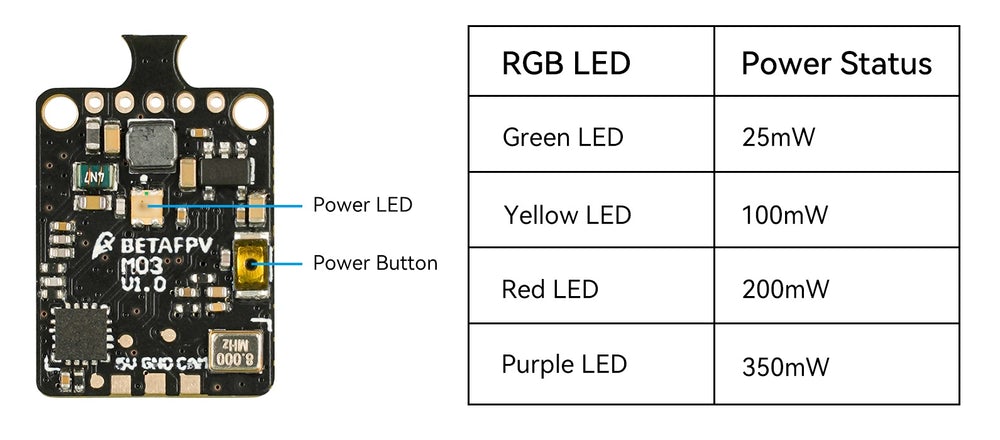
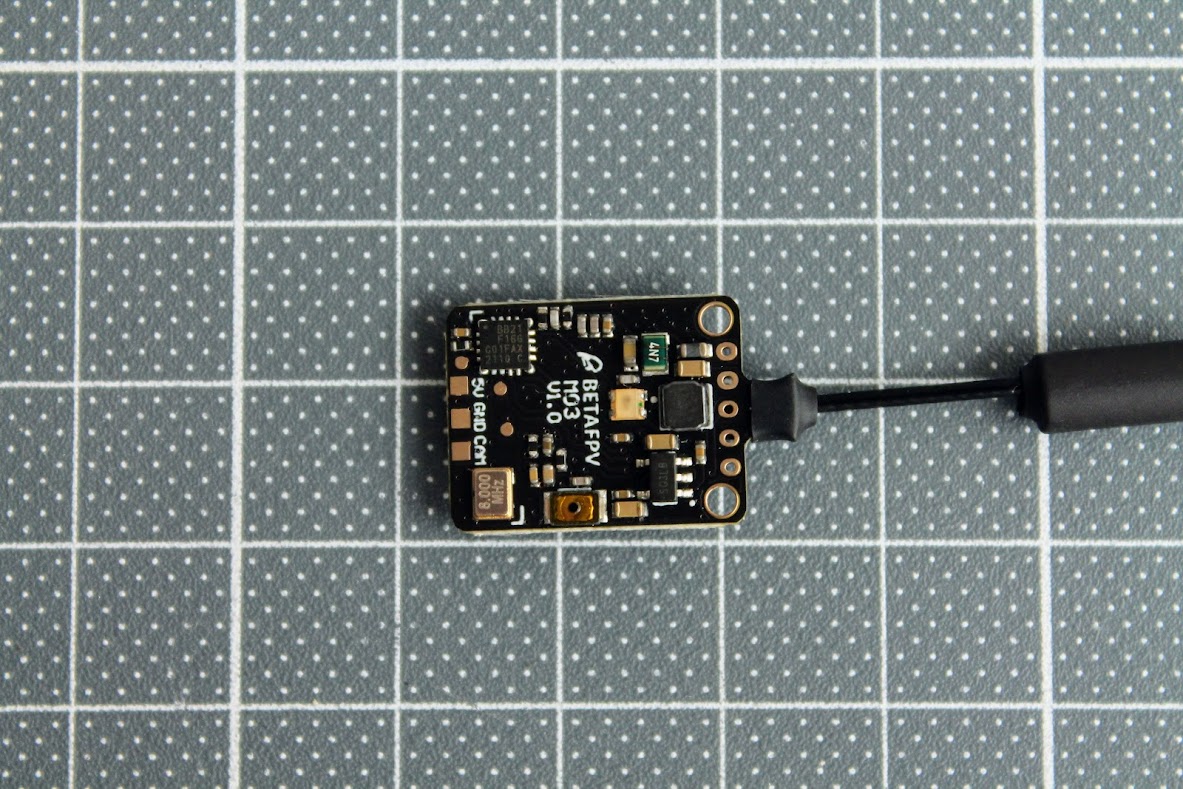
On the bottom side you can find the push button for setting the power output level and the LED for power level output indication.
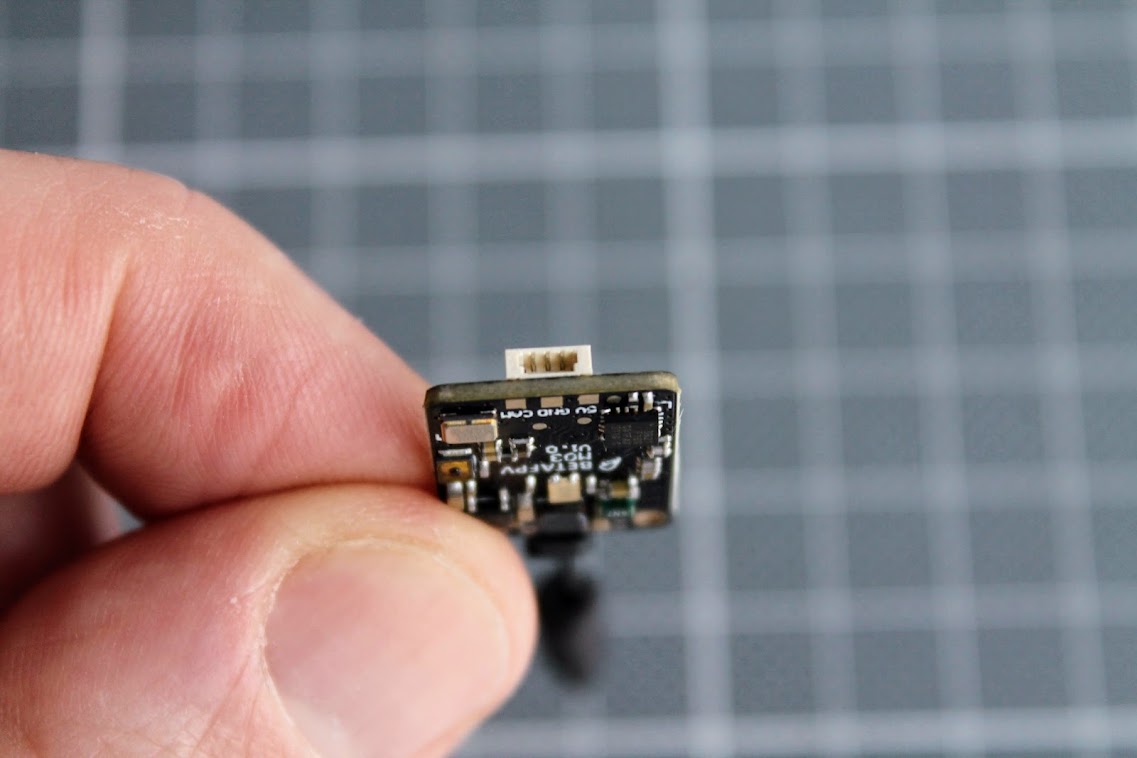
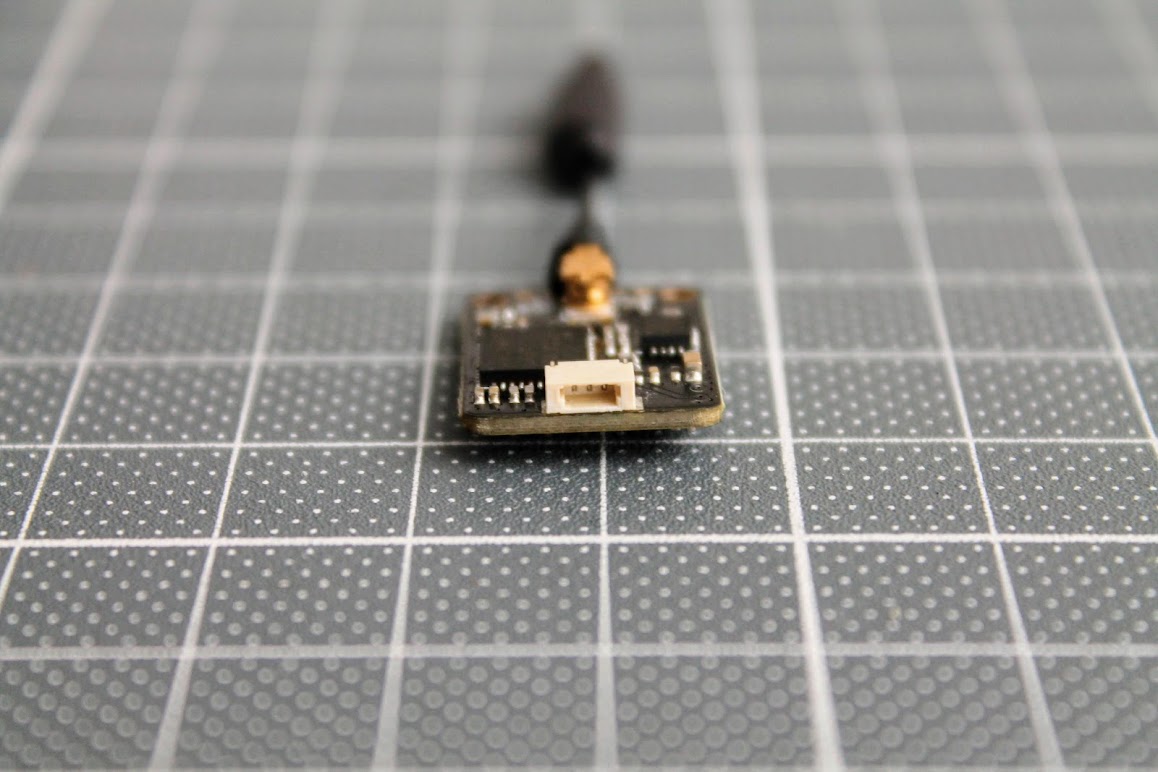
M03 VTX has JST-0.8 connector socket that is direct plug in compatible with BETAFPV C01 (discontinued), BETAFPV C02 and NewBeeDrone BeeEye cameras that have such connector preinstalled. There is also solder pads for soldering the camera vires directly to the VTX.
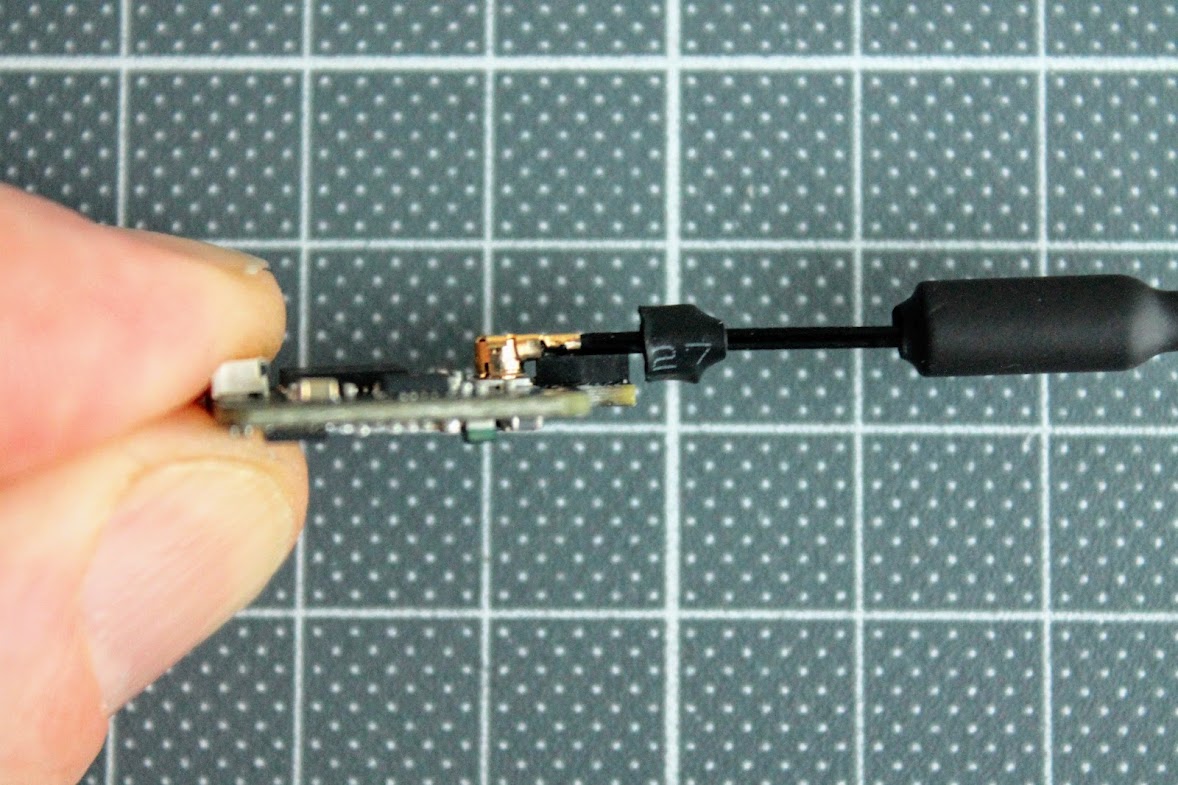
There is a spacer between the antenna and the PCB an the antenna is fixed to the the PCB with small piece of the heat shrink.
Size and weight
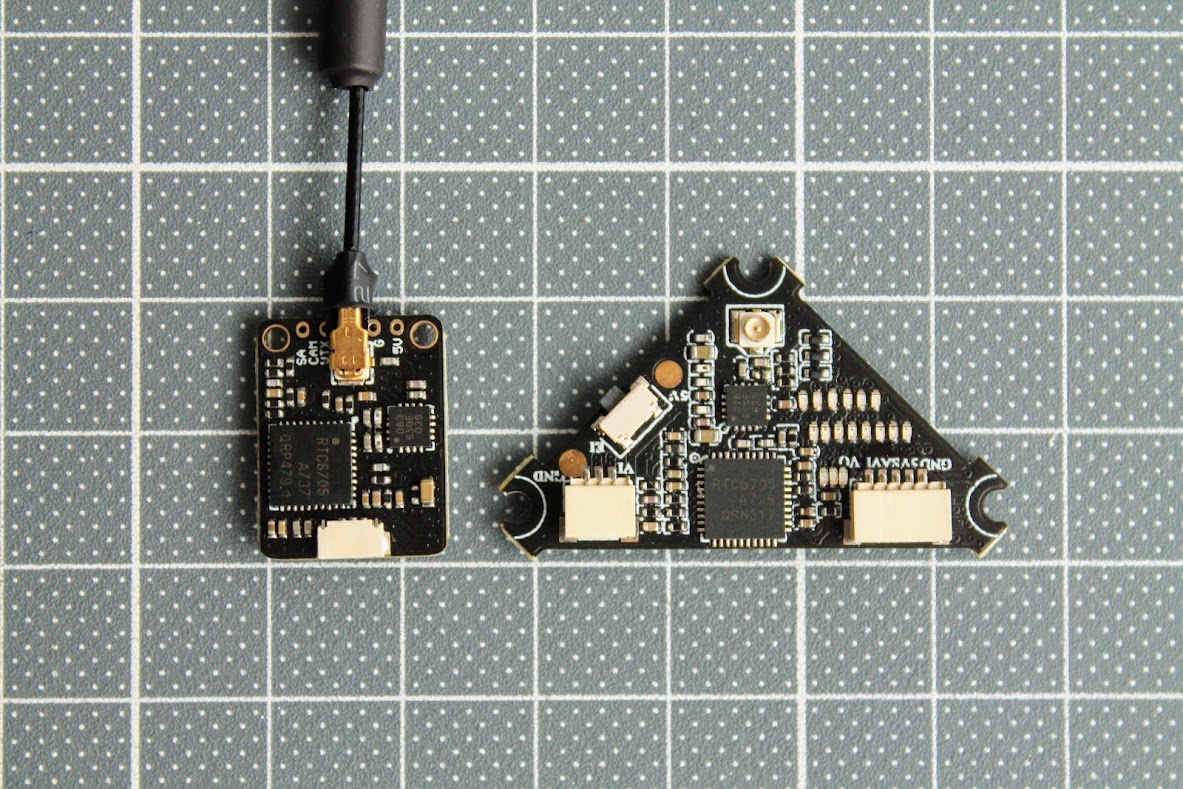
Size comparison with Eachine NanoVTX.
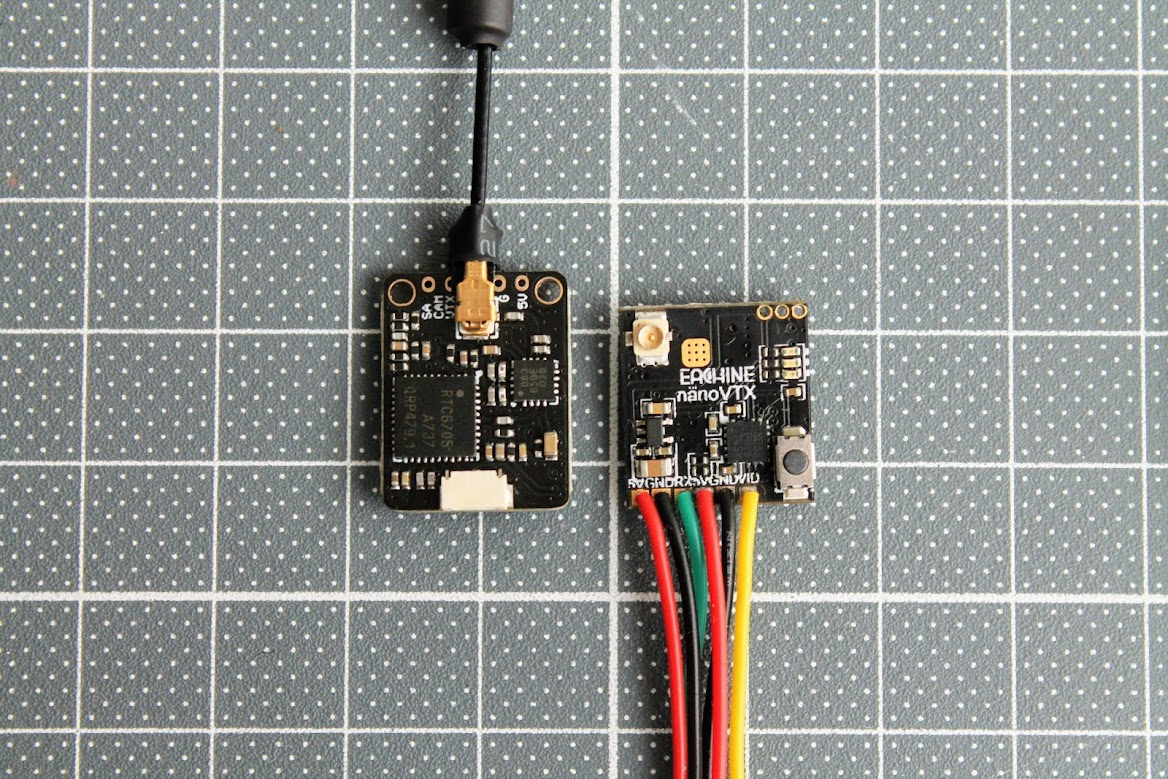 Size comparison with Happymodel WhoopVTX.
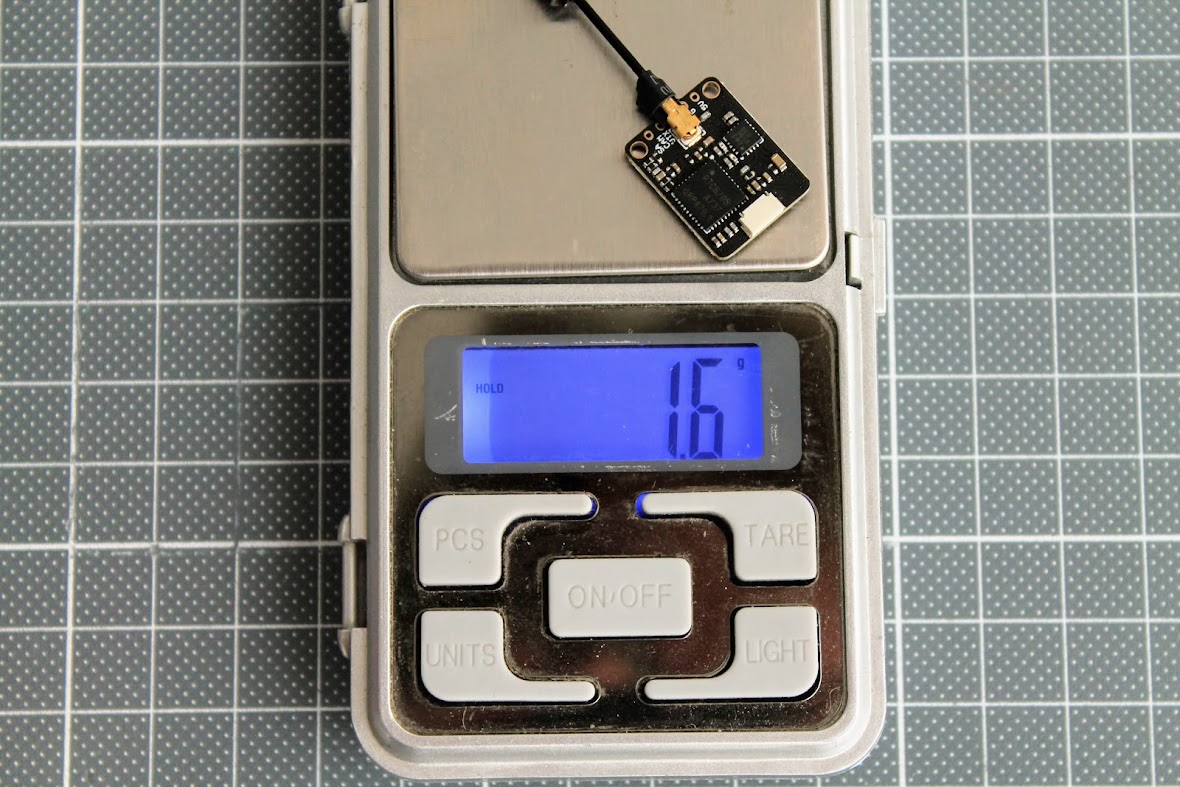
BetaFVP M03 VTX weights 1.6 grams including the antenna.
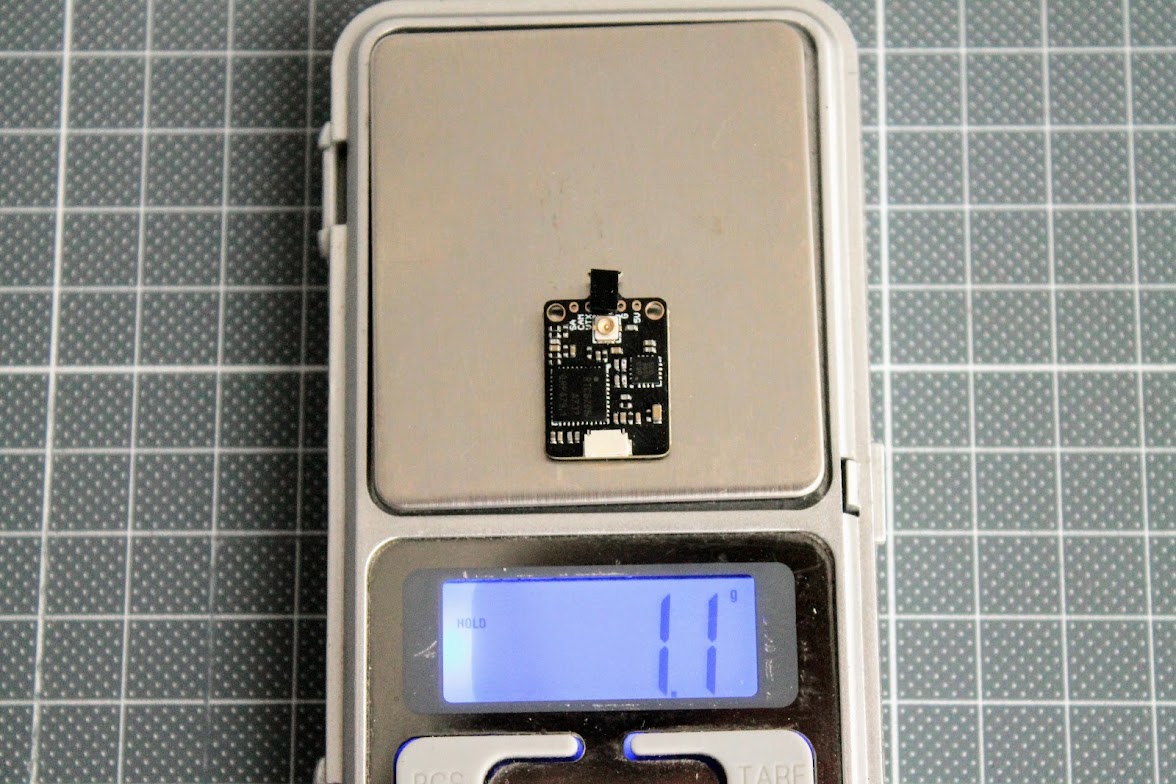
And weights only 1.1 grams without the antenna.
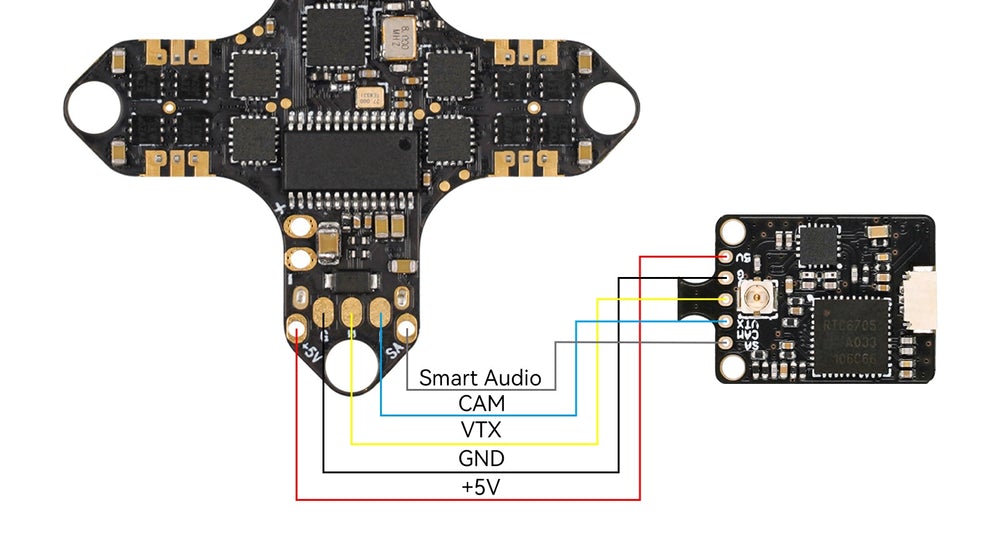
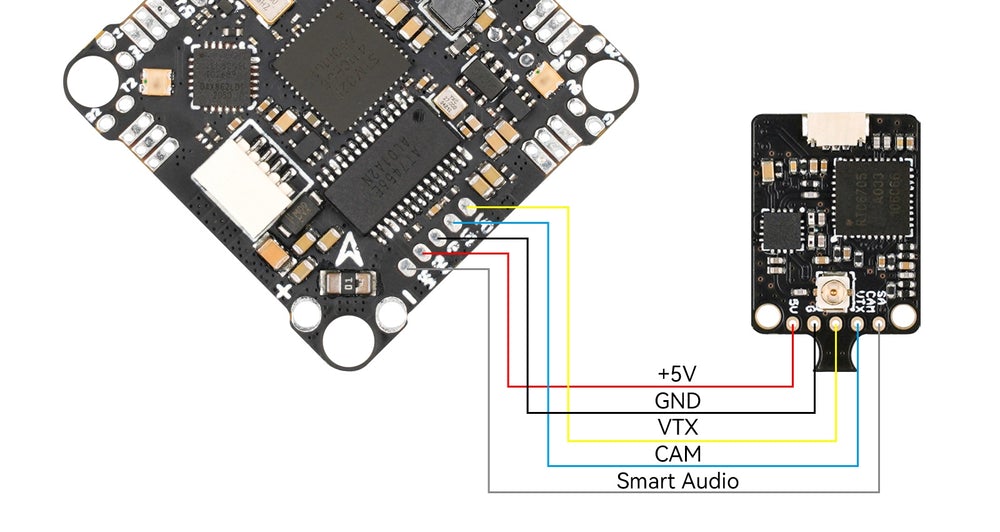
Pinouts and connection diagrams
BetaFPV M03 VTX connection pinout
BetaFPV M03 VTX connection diagram
Power output measurements
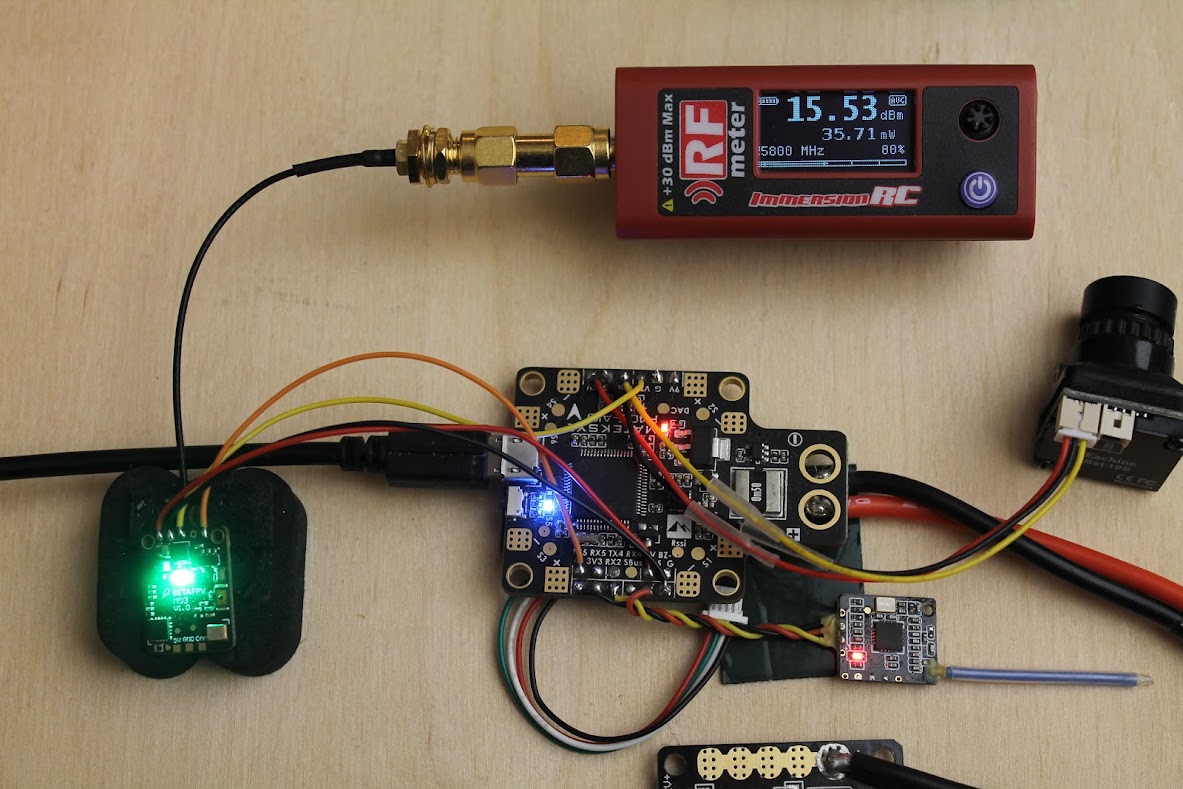
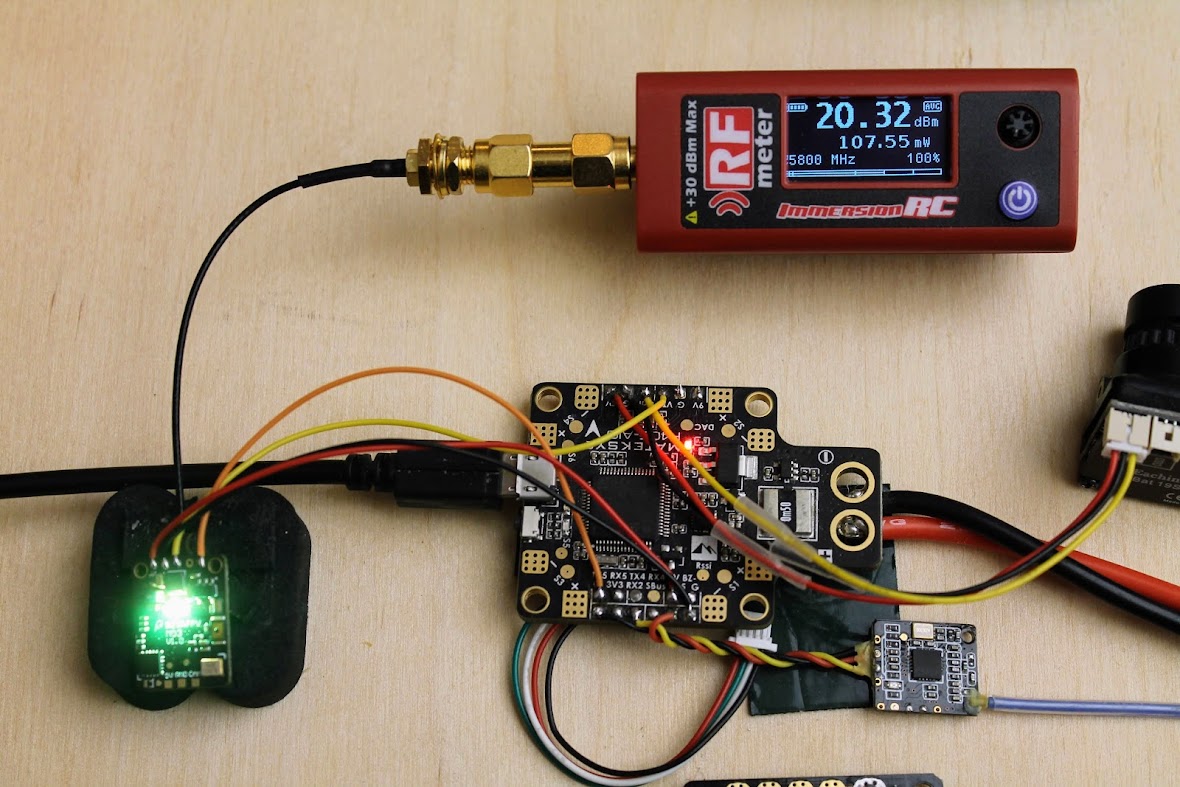
I’ve connected the BetaFPV M03 VTX to the ImmersionRC RF power meter V2 via short u.Fl to SMA pigtail. VTX was cooled with fan while taking the measurements.
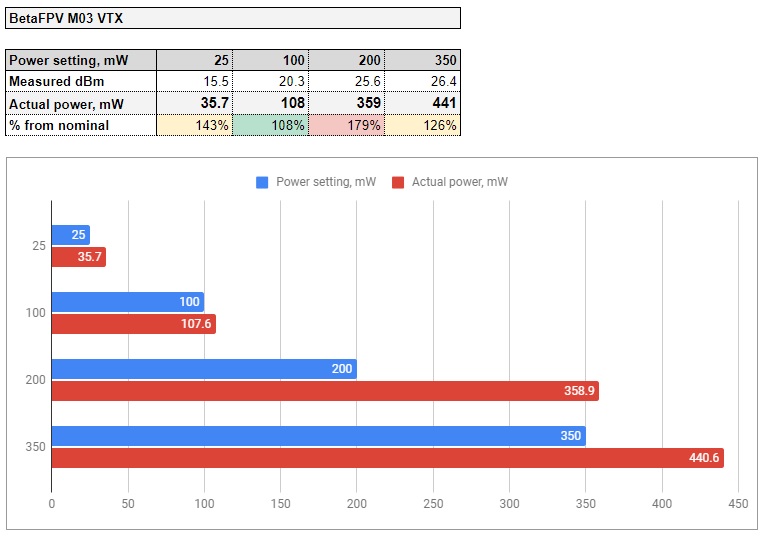
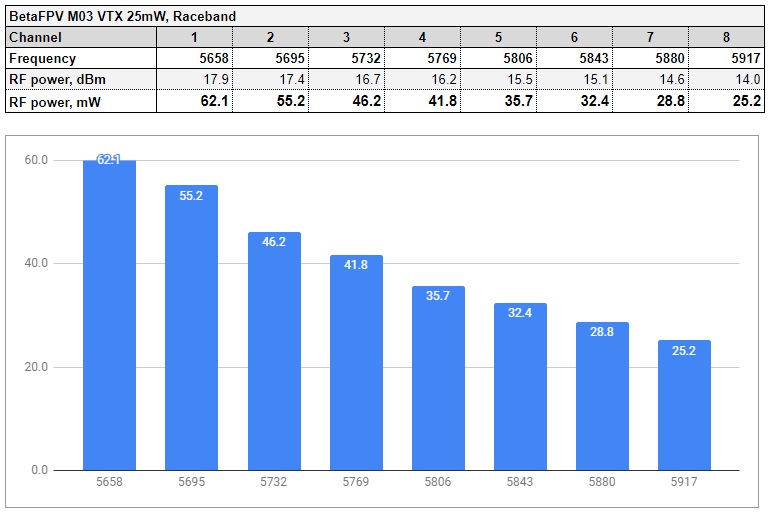
First test – 25mW output setting. In my test it is outputting about 36mW (15.5dBm).
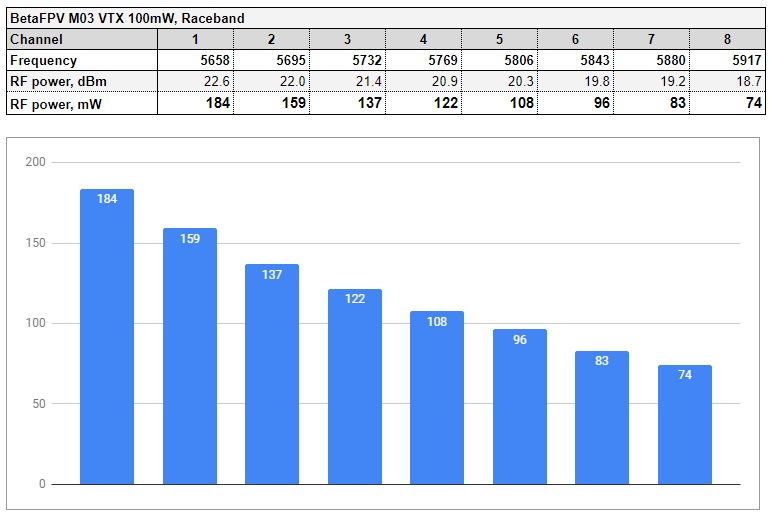
At the 100mW setting it outputs 108 mW (20.3Bm). Pretty spot on.
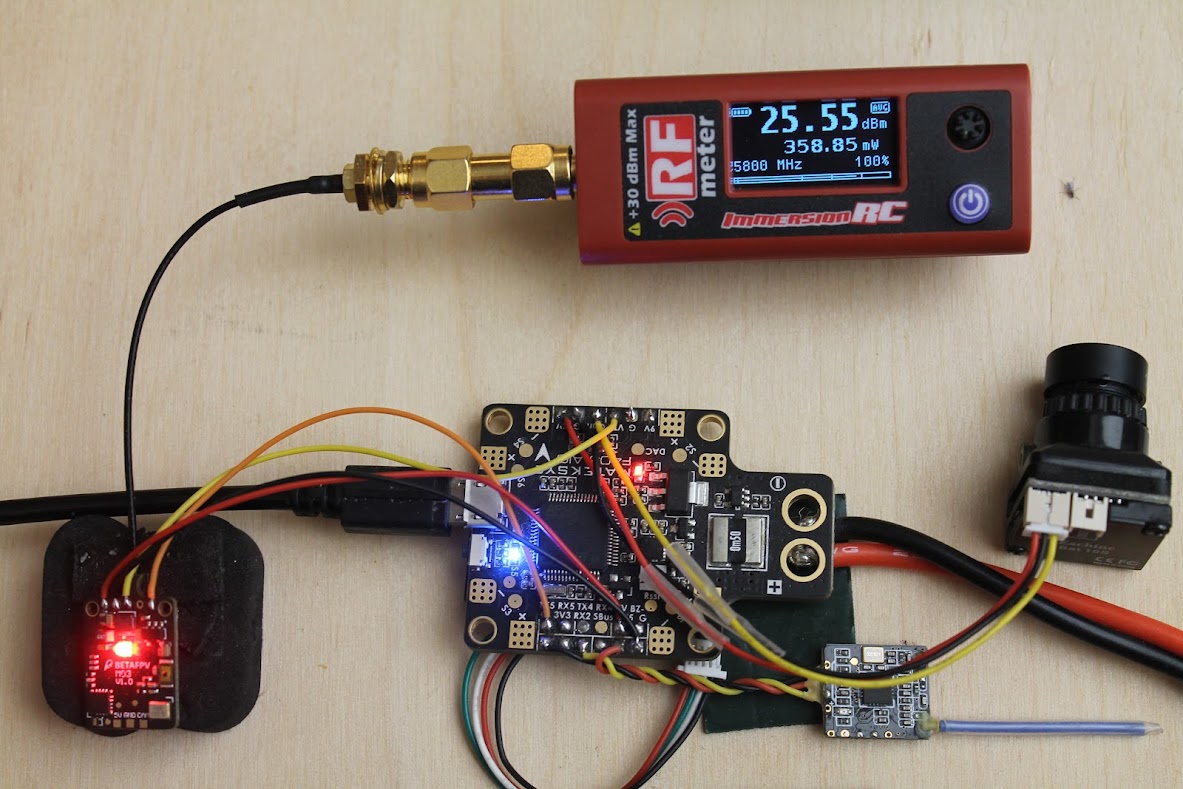
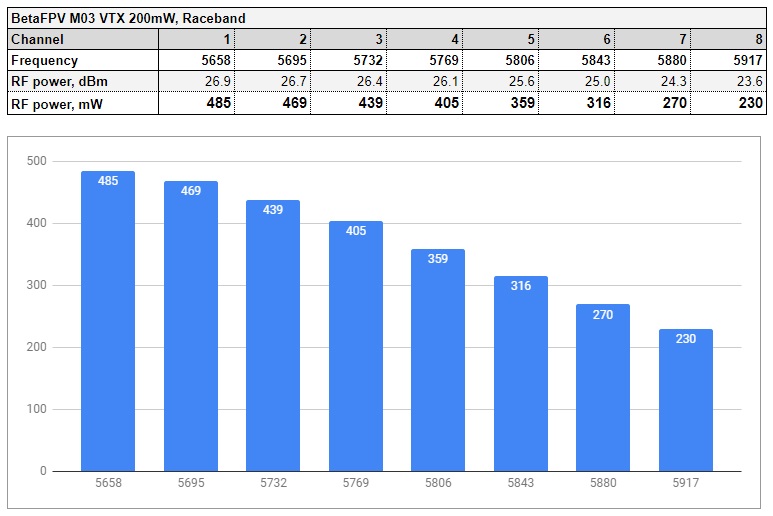
At the 200mW setting it outputs 358 mW (25.55 dBm). This is almost double than the nominal power output!
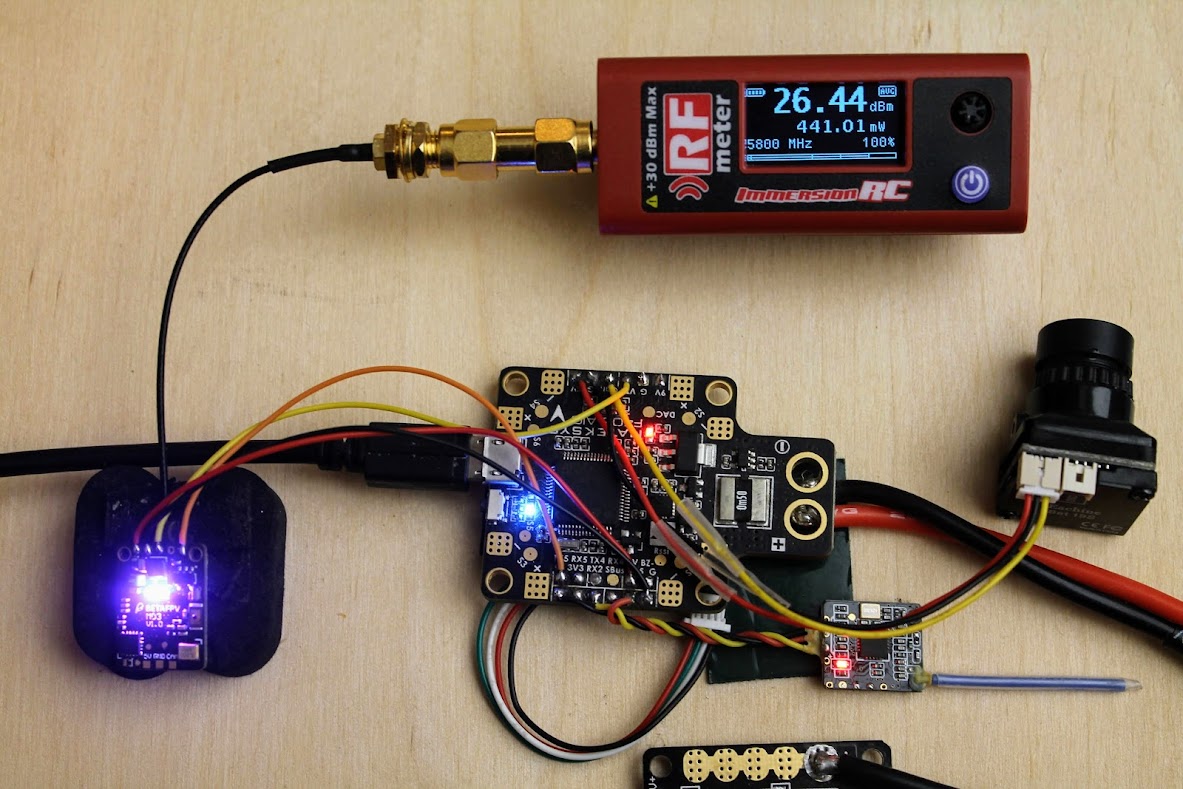
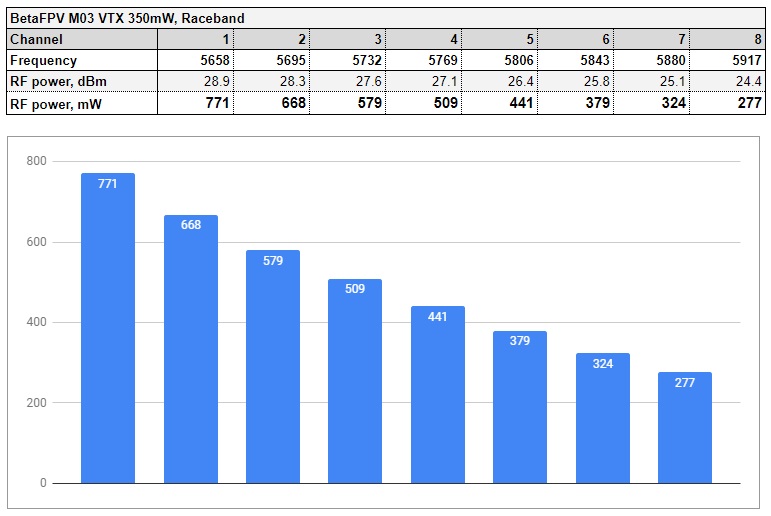
And at the max setting of 350mW it outputs 441 mW (26.4 Bm).
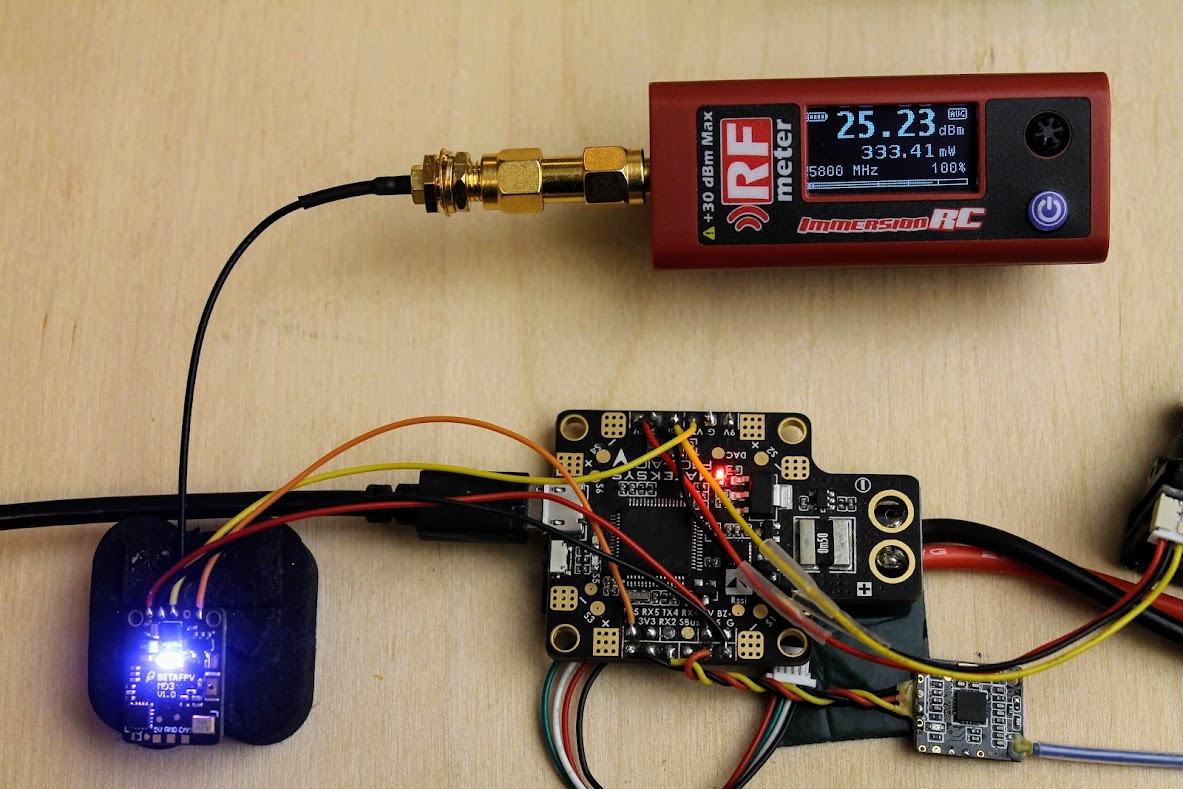
Next test – how stable its power output if the VTX is not cooled actively. So I’ve turned off the fan and let the VTX running for the 5min. The measured power output was 333mW (25.2dBm). Pretty good. The M03 VTX maintains the high power output even without active cooling.
Below are the RF power outputs for all power levels. Measured at Raceband, CH5.
Power output vs frequency for 25mW power level on Raceband.
Power output vs frequency for 100mW power level on Raceband.
Power output vs frequency for 200mW power level on Raceband.
Power output vs frequency for 350mW power level on Raceband.
The deviations are really significant. On the 25mW power output you can get the 62mW on the CH1 and the 25mW on the CH8. On the 350mW power output level you can expect the M03 VTX to output even 770mW of the RF power on the CH1. and only 277mW on the CH8. The power output of this little VTX is really impressive!
Changing the VTX settings
BetaFPV M03 VTX settings (band, channel and power output level) can be changed by Betaflight OSD control. There is no way how to change the band and the channel manually and You can only change the power output level by pressing the button.
VTX has one multicolor LED indicator for power level display. Green light is for 25mW, Yellow for 100mW, Red for 200mW and Purple light indicates 350mW.
Betaflight setup and VTX Tables
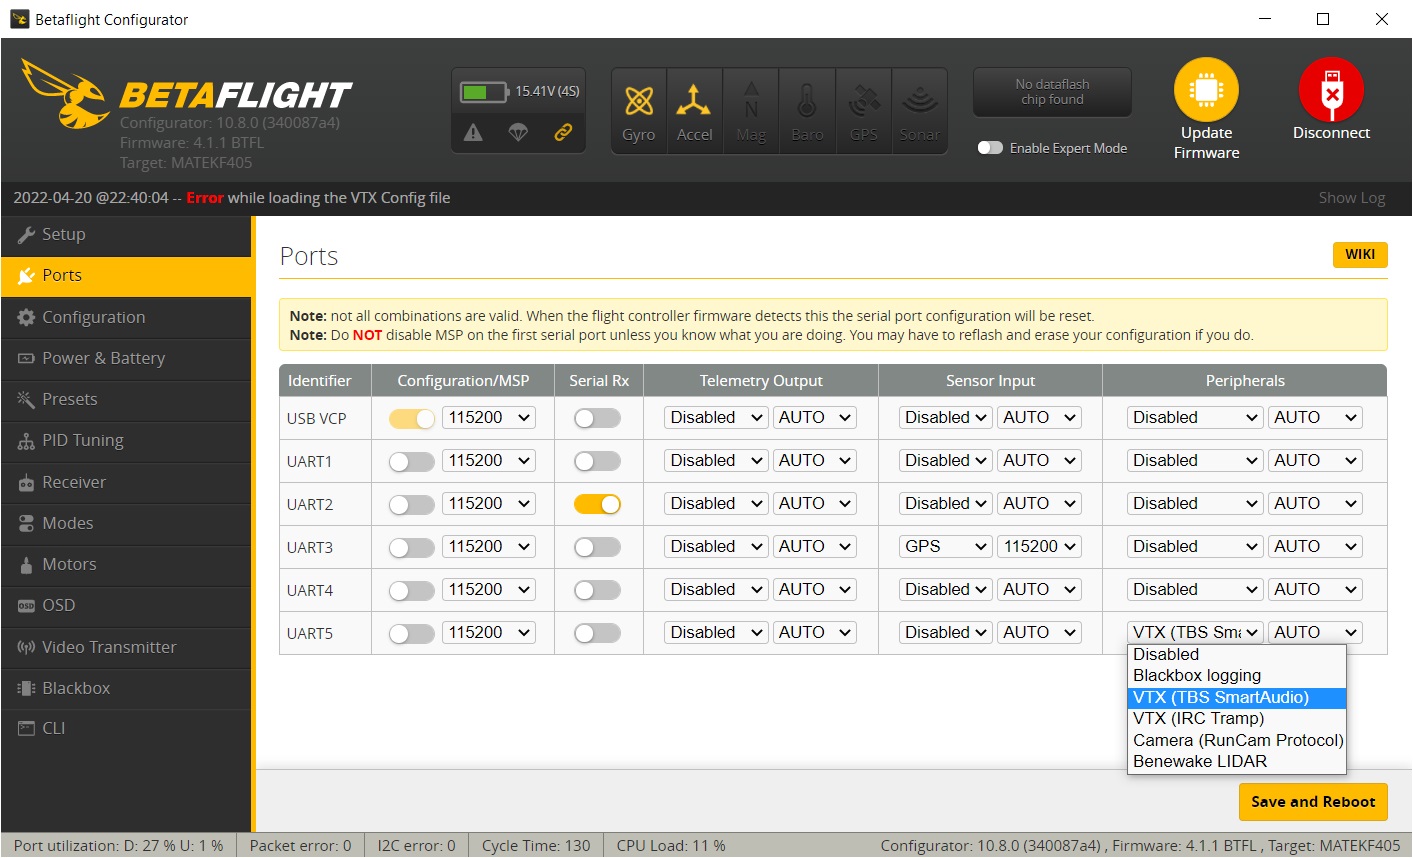
BetaFPV M03 VTX is working with TBS SmartAudio protocol. You should connect the SmartAudio wire from the VTX to the any available TX pad on the FC.
In the Betaflight Configurator, choose TBS SmartAudio protocol in the Peripherals tab
Read more about SmartAudio here: Guide: SmartAudio VTX control and how to set it up
If you are using (or planning to use) the Betaflight versions 4.x and want to control the VTX by Betaflight OSD, then you should set up the VTX Tables.
Read more on setting up the VTX tables here: VTX Tables and how to set them up
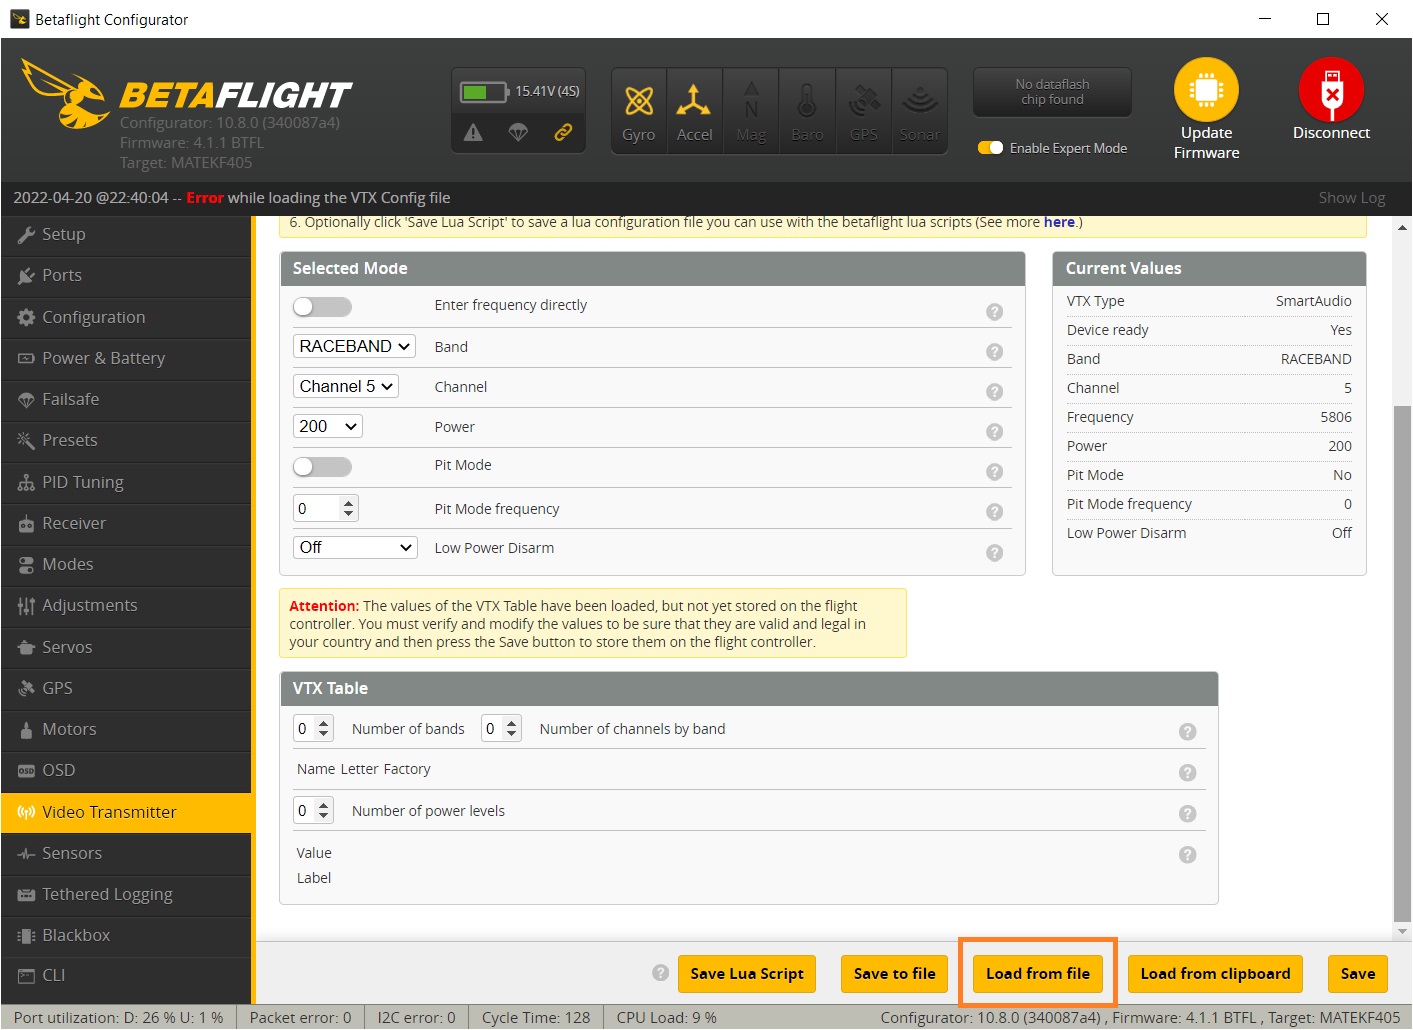
Open Betaflight Configurator, connect to the flight controller, select “Video Transmitter” tab. Load the VTX table from the file by clicking on the [Load from file] button.
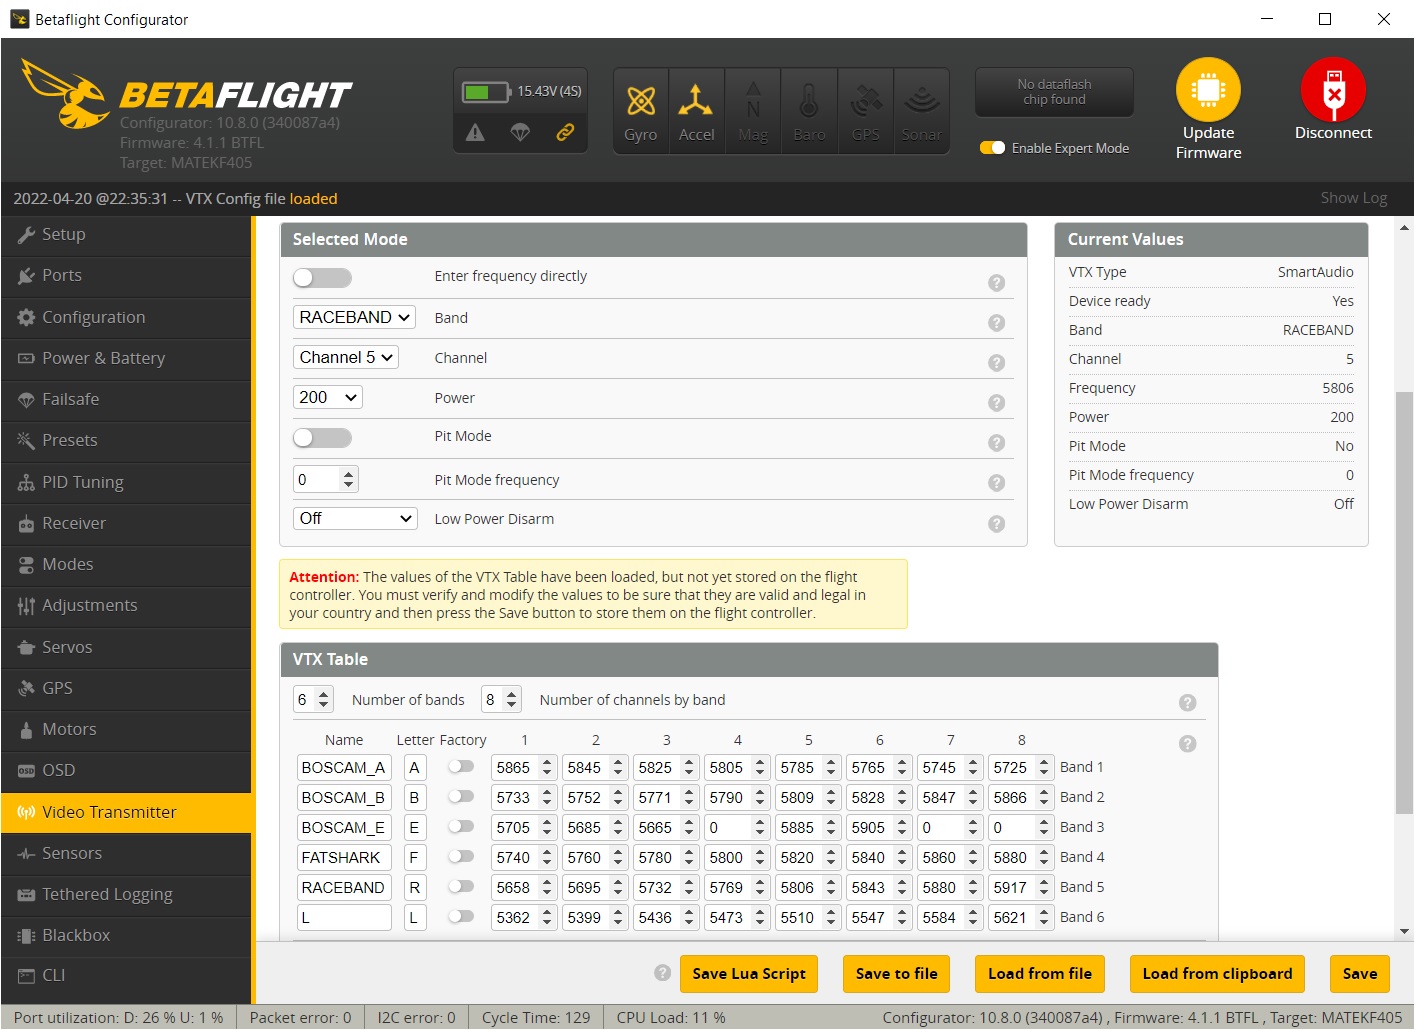
Select the VTX table file. There can be separate VTX table files for US and EU region as there are different range of the allowed frequencies to use. (Hint: European table has only the 3 channels on Raceband).
Once VTX file is loaded, you should see the VTX table with the right frequencies and power settings.
Don’t forget to hit the [Save] button.
BetaFPV M03 VTX Betaflight VTXtable file: https://drive.google.com/file/d/1qqowepTWmj_be-WsJ-jtUsAx5_aNsos7/view
Conclusions & final thoughts
BetaFPV M03 VTX is the smallest VTX from BetaFPV. Despite being so small it is really powerful as it can output 350mW and even more. I have recorded the power output up to 771mW on the Raceband, CH1. Power output ranges from 62 mW to 25 mW on the 25mW power setting and from 771 mW to 277 mW on the 350mW setting. On the lower channels you can get enormous amount of the power output. Have that in mind if you are looking for the maximum FPV range.
BetaFPV M03 VTX has probably the best power to weight ratio in the market. It has 401mW/1g ratio. Currently unmatched. It also set my personal record of the nano sized VTX absolute maximum power reached – 771mW.
The bottom line – M03 VTX is definitely one of the best VTX options for whoops and ultralight quadcopters.
BetaFPV M03 VTX is available @
BetaFPV: https://betafpv.com/products/m03-25-350mw-5-8g-vtx
Disclaimer: This item was supplied by BetaFPV for a fair and unbiased review. BetaFPV never asked for a positive review and never influenced my opinion in any way. I’m trying my best to stay uninfluenced and give only my own opinion. All affiliate links if there are any help me purchase items for future reviews and tests.


Hi, is the remote control protocol TBS smartaudio or IRC tramp? In the screenshot you seem to be using tramp yet the BetaFPV product page states smartaudio (no precise version…)
I cannot get it to work, the wiring is ok but smartaudio device ready state is always “no” (it is also “no” on your screenshot, are you sure it worked ??)
BetaFPV M03 VTX works with TBS SmartAudio protocol. The screenshot was just for illustrational purpose on how to load the VTX table. It indeed worked. All the VTX devices were tested before posting the VTX table. Check your wiring and setup. Refer to this guide Smartaudio VTX control and how to set it up.
I will update the article with more details on the VTX setup.
works only on 5.3 L1 and only periodically sometimes works sometimes not, in the flight with the glasses I see a black screen and no OSD,but disarmed quad camera works good
Betaflight settings are ok
I don’t know what to do