Restoring bricked Caddx Turtle after failed firmware update
If you have failed to update the Caddx Turtle firmware, then you’ll probably have “bricked” device that refuses to work (black screen, no video out, no reaction to buttons, etc). Don’t be upset and don’t throw it away – it is relatively easy to restore the firmware by using the Arduino board.
Hardware
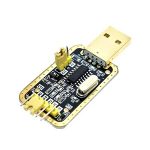
USB to TTL adapter. Better get one with 3.3V option. I have tested the cheap CH340G adapters and they work flawlessly, therefore I recommend them.
(Possible variants on ebay: https://www.ebay.com/sch/i.html?_nkw=USB+to+TTL+CH340G+3.3V)
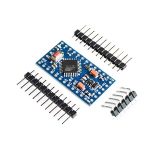
Arduino Mini Pro with Atmega328P. Probably any Atmega328 based Arduino board should fit, just have in mind that we need 3.3V power supply and logic levels.
(possible variants on ebay: https://www.ebay.com/sch/i.html?_nkw=Arduino+Mini+Pro+atmega328)
Software
You can download all the software in one package here: http://bit.ly/Google-Drive-Caddx-Turtle-Firmware-Flashing or you can download the individual packages from the list down below:
-
- Flashrom programming utility (https://www.flashrom.org ). If your PC runs on Windows then I recommend to download already compiled windows version here: http://ra.openbios.org/~idwer/flashrom/mingw/ (Edit: link seems to be dead now, but we have it saved on Internet Archive: https://web.archive.org/web/20181112215901/http://ra.openbios.org/~idwer/flashrom/mingw/)
- XLoader to upload binary file to Arduino board (http://russemotto.com/xloader/ ) (alternative link: http://www.hobbytronics.co.uk/download/XLoader.zip)
- Arduino firmware [frser-duino.hex] (download link: https://drive.google.com/file/d/0BxZ43kLDo-GFOWJnQ19HYWVZVmc/view)
- Caddx Turtle firmware flash dump file [flash.hex] (download link: https://bit.ly/Goggle-Drive-Caddx-Turtle-Firmware-Dump-files)
Note! It seems that the Caddx has changed the Turtle Cam sensor board for the latest batches and you should pay attention what firmware you are uploading. There are two firmware files: for old sensor board and the new sensor board. The provided firmware may not work for particular your version of Caddx Turtle. Do the firmware backup!
Procedure step by step
First you need to flash Serprog firmware to Arduino Mini Pro:
- Connect USB – TTL converter to Arduino Mini Pro board
- If everything is ok, You should see “FTDI” or “USB-SERIAL CH340” device in device manager
- Connect Arduino Mini Pro to USB-TTL adapter (check that your FTDI or USB Serial adapter uses 3v for powering)
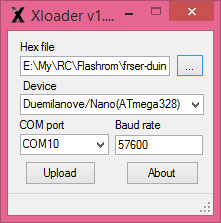
- Start Xloader, open [fser-duino.hex] file, set the COM port and hit “Upload” (tip: Press and hold Reset button on the Arduino board and release right before you hit the “Upload” button).
Now You have Flashrom compatible programmer.
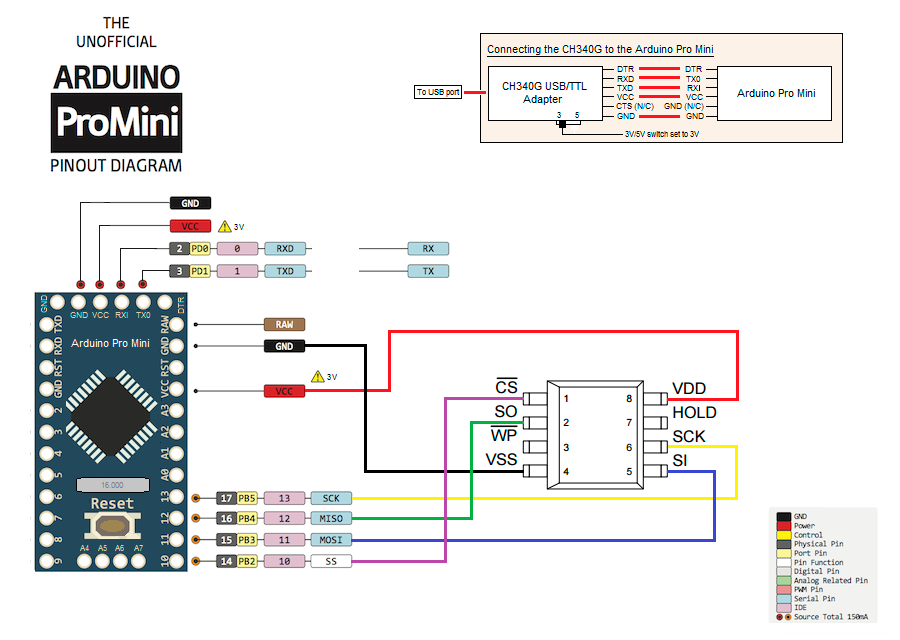
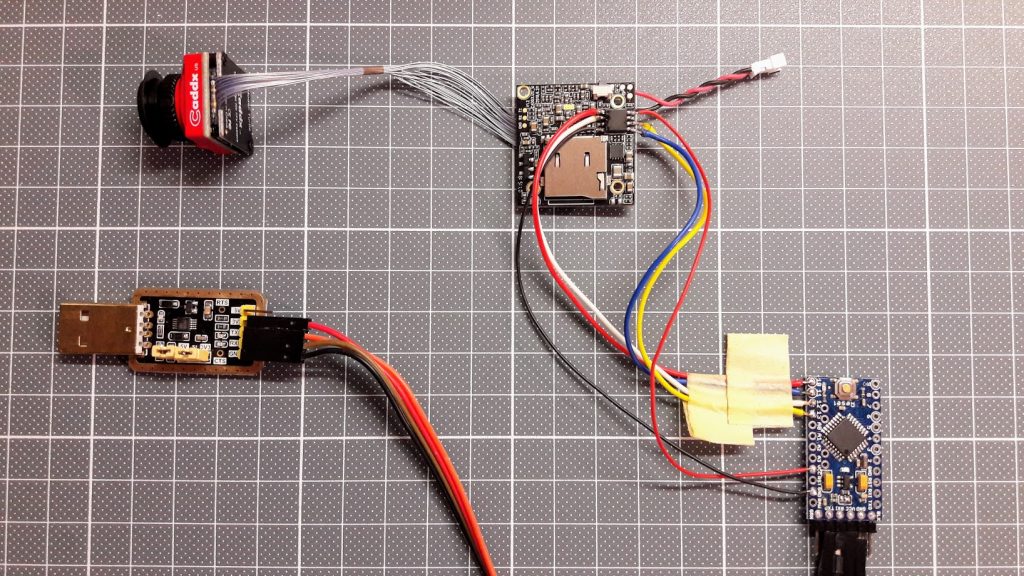
Connect the Turtle serial flash IC to the Arduino. Use supplied connection schematic. Solder 6 wires: VCC, GND, CS, CLK, MOSI and MISO. Try to keep them as short as possible, better about 10cm. Use small diameter wire.
Connection table:
| FLASH CHIP | ARDUINO BOARD |
|---|---|
| VCC (pin 8 ) | 3.3V output (5V can kill the board!) |
| GND (pin 4) | GND pin |
| CS (pin 1) | pin 10 |
| MISO (pin 2) | pin 12 |
| MOSI (pin 5) | pin 11 |
| Clock (pin 6) | pin 13 |
Connection schematic:
Caddx Turtle Flash chip connected to the Arduino board should look like that:
Do not power the Caddx Turtle board with alternative power source. It should be left only connected to Arduino board.
Once you have everything connected, try reading the contents of flash IC by running this command in Windows Command prompt:
mingw32-w64-flashrom-r1781.exe --programmer serprog:dev=COM7:115200 -c MX25L6445E --read test.hex
Here in the parameter --programmer serprog:dev=COM7:115200 change COM7 to whatever COM number your USB-TTL adapter has.
You should get similar output to this:
E:\My\RC\Flashrom\Caddx.Turtle>mingw32-w64-flashrom-r1781.exe --programmer serprog:dev=COM7:115200 -c MX25L6445E --read test.hex

flashrom v0.9.7-r1781 on Windows 6.2 (x86)

flashrom is free software, get the source code at http://www.flashrom.org
Calibrating delay loop... OK.

serprog: Programmer name is "frser-duino"

Found Macronix flash chip "MX25L6445E" (8192 kB, SPI) on serprog.

Reading flash... done.
Be patient – reading 8Mbytes of the data takes ~ 10 min.
If everything goes OK by this far, you are ready to flash the firmware. To flash the device, start this command:
mingw32-w64-flashrom-r1781.exe --programmer serprog:dev=COM7:115200 -c MX25L6445E --write flash.hex
You should get similar output to this:
E:\My\RC\Flashrom\Caddx.Turtle>mingw32-w64-flashrom-r1781.exe --programmer serprog:dev=COM7:115200 -c MX25L6445E --write flash.hex
flashrom v0.9.7-r1781 on Windows 6.2 (x86)flashrom is free software, get the source code at http://www.flashrom.org
Calibrating delay loop... OK.
serprog: Programmer name is "frser-duino"

Found Macronix flash chip "MX25L6445E" (8192 kB, SPI) on serprog.
Reading old flash chip contents... done.
Erasing and writing flash chip... Erase/write done.
Verifying flash... VERIFIED.
Note: Flashing 8Mbytes of the data takes a lot of time – be patient. Arduino flashing device uses slow SPI connection with 115200 baud rate. (approx 14kb per second, or 840kb per minute) so it takes about 10 min to read, 20 min to erase-write and 10 min to verify…
Note: Caddx Turtle can not boot normally while the Arduino board is connected. Options – you can disconnect the wires after the flashing or you can hold the reset button on the Arduino board while the Caddx Turtle is booting to check if everything is working after the flash process.
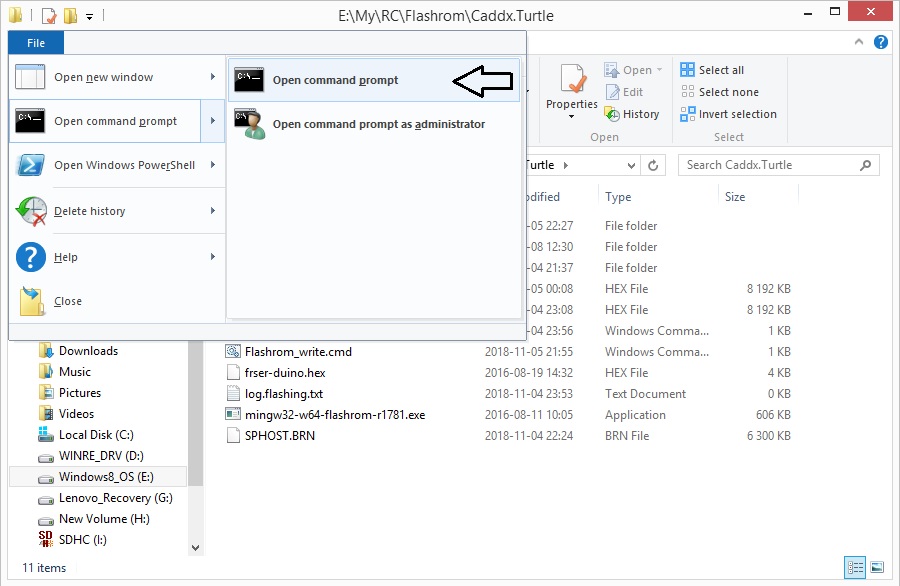
Note: Windows command prompt can be opened by selecting the File – Open command prompt from the file explorer menu.
You are done! You have successfully restored the firmware.
If you have questions or you need more details, then leave a comment below.
Mandatory disclaimer: Do it on your own risk. Flashing the firmware can result in bricking your device.


Hi Montis, did you have similar solution for bricked caddx vista? Thank you!
Hi, no unfortunately I don’t own any vista and I’m not familiar with Vista issues.
Hi, any update on the new firmware for the new sensor board?
You can find the firmware dump file dated Sep 23 2019 that works with the newer sensor board.
http://bit.ly/Google-Drive-Caddx-Turtle-Firmware-Flashing
I flashed the Sep 23 2019 file on my camera.
I now have a black screen with just the OSD text.
The camera don’t want to go in update mode if i put the older file on the SD any longer..
Try to flash the firmware with Arduino/Flashrom as described in the article.
Why are you using arduino for programing SPI ? There are cheap programers for SPI on ebay (~10euro). With CH341A its possible to flash this chip without soldering. Look: https://www.ebay.de/itm/393455583490 Connect clamp, download dumps: https://drive.google.com/file/d/1XrrhgzeTashTR1-j3ZTARUlilY9I8pG0/view open with programer software, click write. Its simple.
Hi, well at the time of writing this article I was not aware about the CH341A programmer. Also the idea of using simple Arduino board was fascinating me.
Thanks for the info.
Hi Agnus, can u show all pins to connected with clamp? Thanks
Hi Agnus, can u show all pins to connected with clamp? and send the model of the programmer that you use?
Thanks
there’s a little dot on the corner of the chip, align it with the red cable on the clamp. By the way.. you can’t flash the chip with the SPHOST.BRN file, you have to use the original .BIN file from the working chip.
contact me at dfebrihardy6@yahoo.com if you want the original firmware.
hi.How many minutes does it take with xloader?
Will it work with arduino nano atmega328p?
Reading the firmware takes a while. If I remember correctly it took more than half an hour to write the firmware.
Arduino Nano should work, though I have not tried with this particular Arduino Board. I have used Arduino Mini Pro.